Pixel Quilts Made Simple: How to Use a Fusible Grid
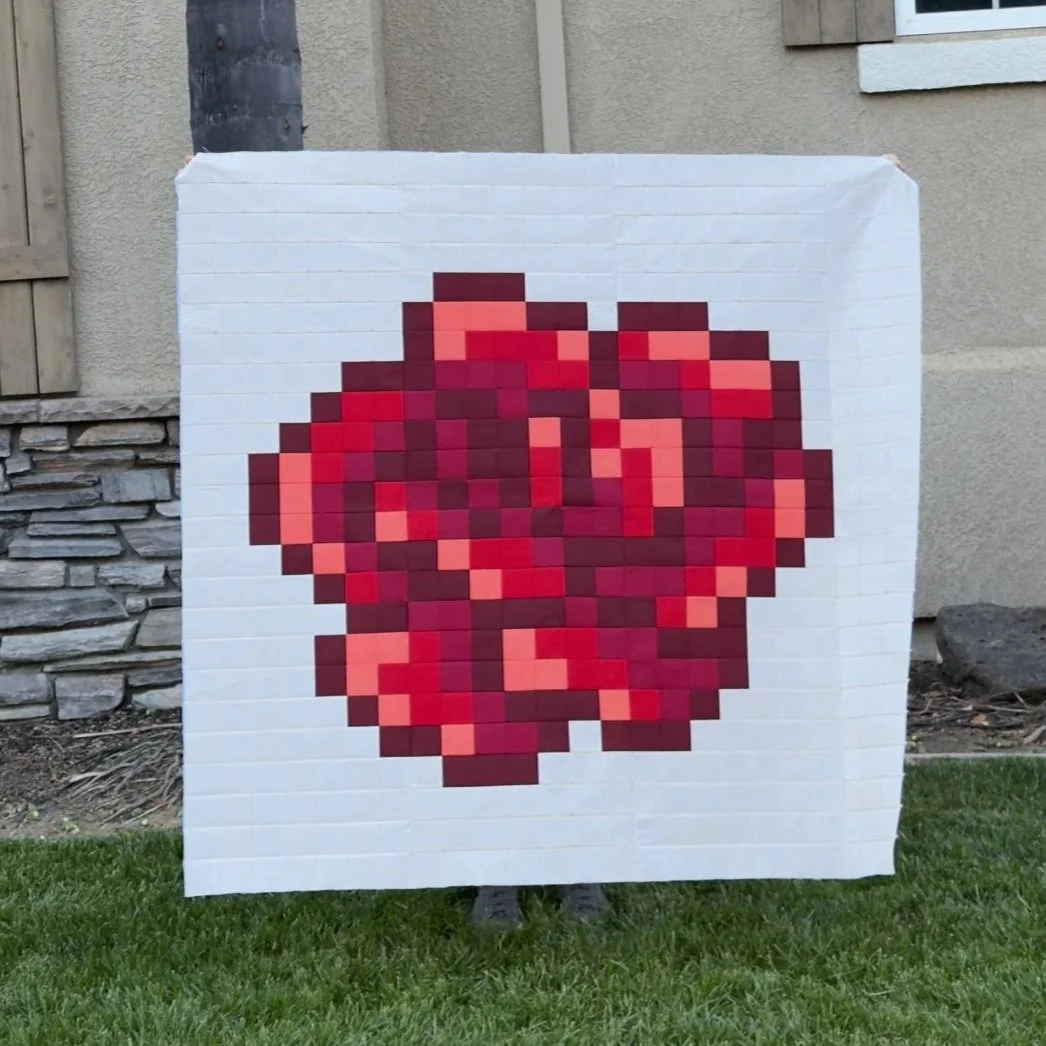
If you’re starting one of my Pixel Blooms quilt patterns and staring at all those squares thinking, “This is going to be a lot…” — I want you to know something:
It’s completely doable.
Pixel quilts look complex, but they’re really just one square at a time. That’s why I often recommend using a fusible grid for construction.
This method keeps everything steady, organized, and far less overwhelming — especially if you’re newer to quilting or working with smaller pieces.
Lets walk through it together.
What Is a Fusible Grid?
A fusible grid is a lightweight interfacing with a printed grid on it. These grids come in different square sizes, so before purchasing one, double-check your pattern to ensure:
The grid square size matches your pattern requirements
You purchase enough panels to cover your full quilt top
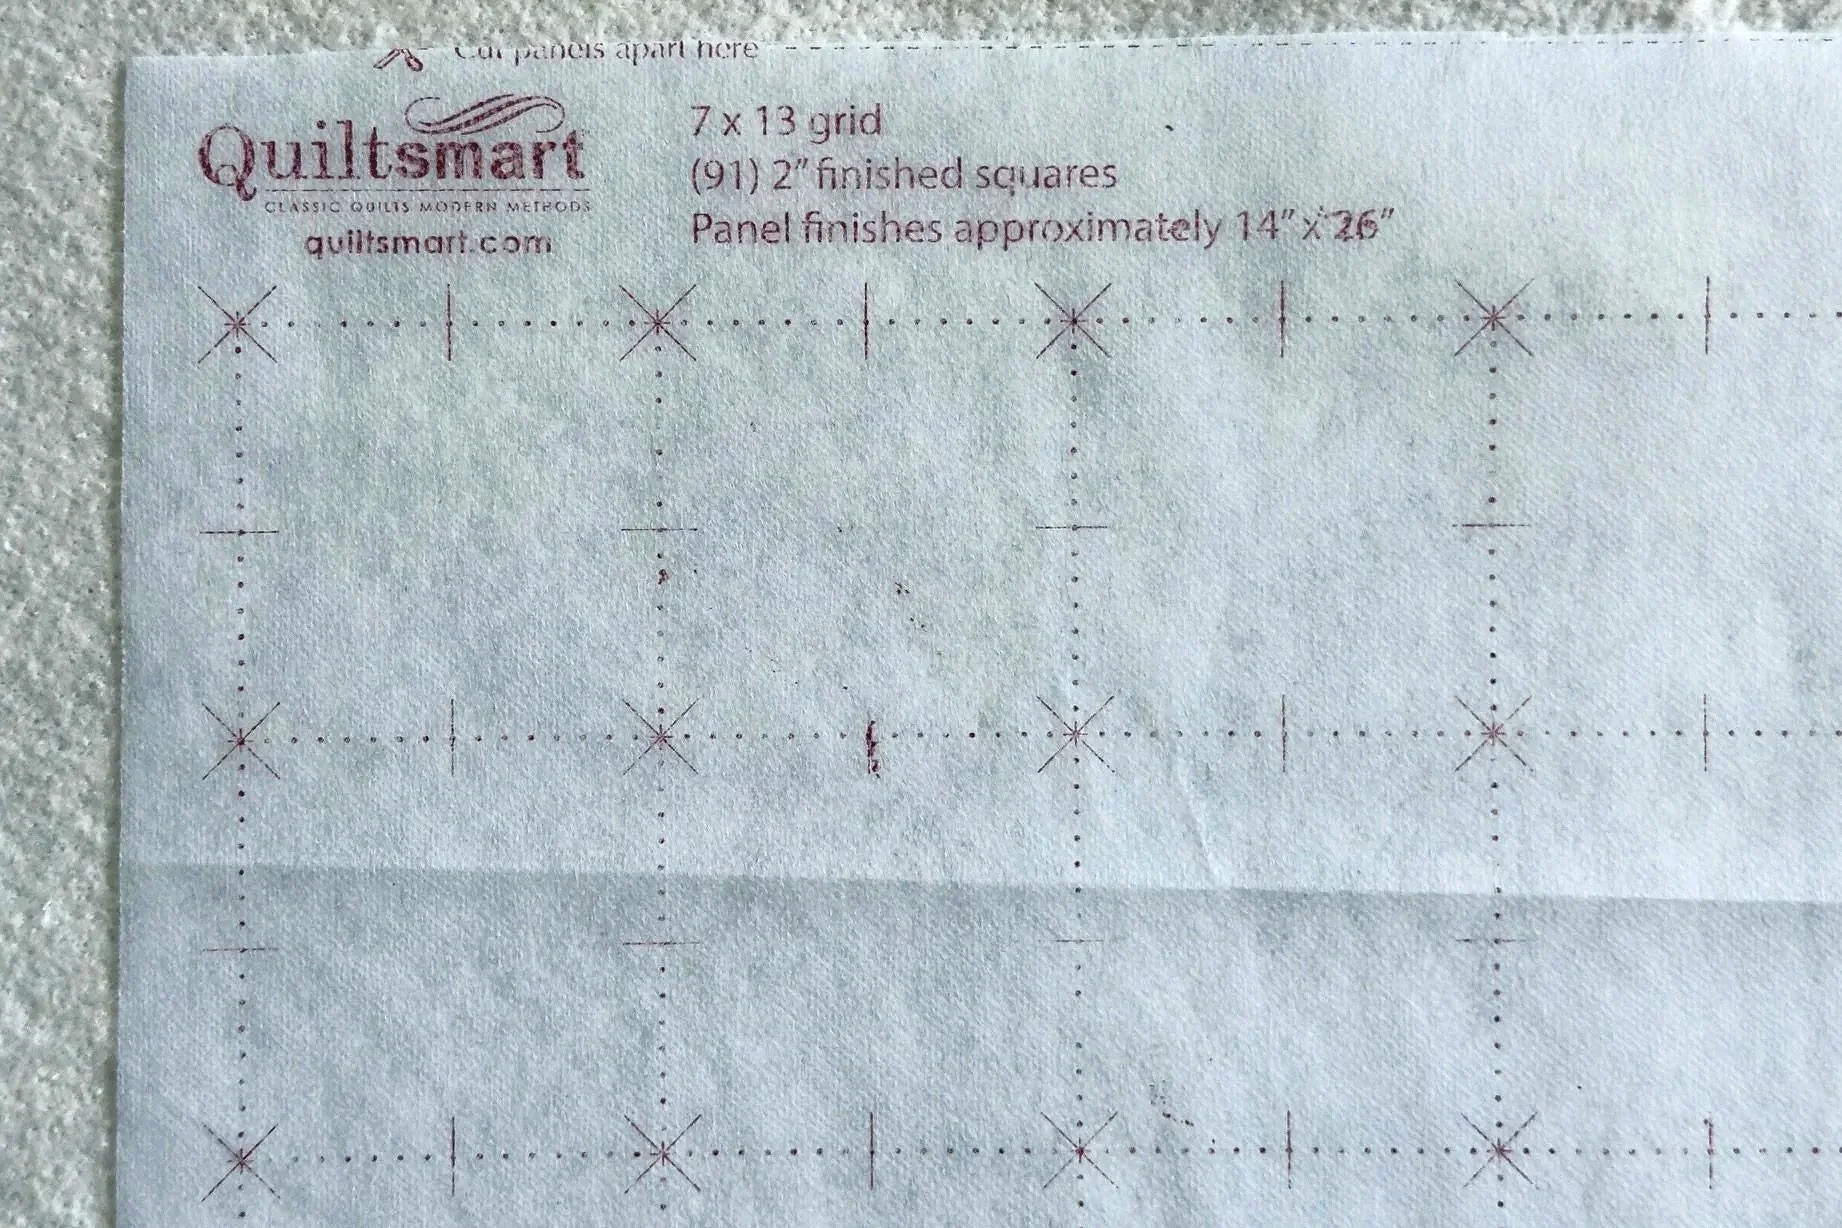
Each printed square represents one fabric “pixel” in your quilt. Instead of sewing hundreds of loose squares together row by row, you:
Place each fabric square onto the grid
Fuse them in place
Sew along the grid lines
Simple, structured, and efficient.
Why Use a Fusible Grid?
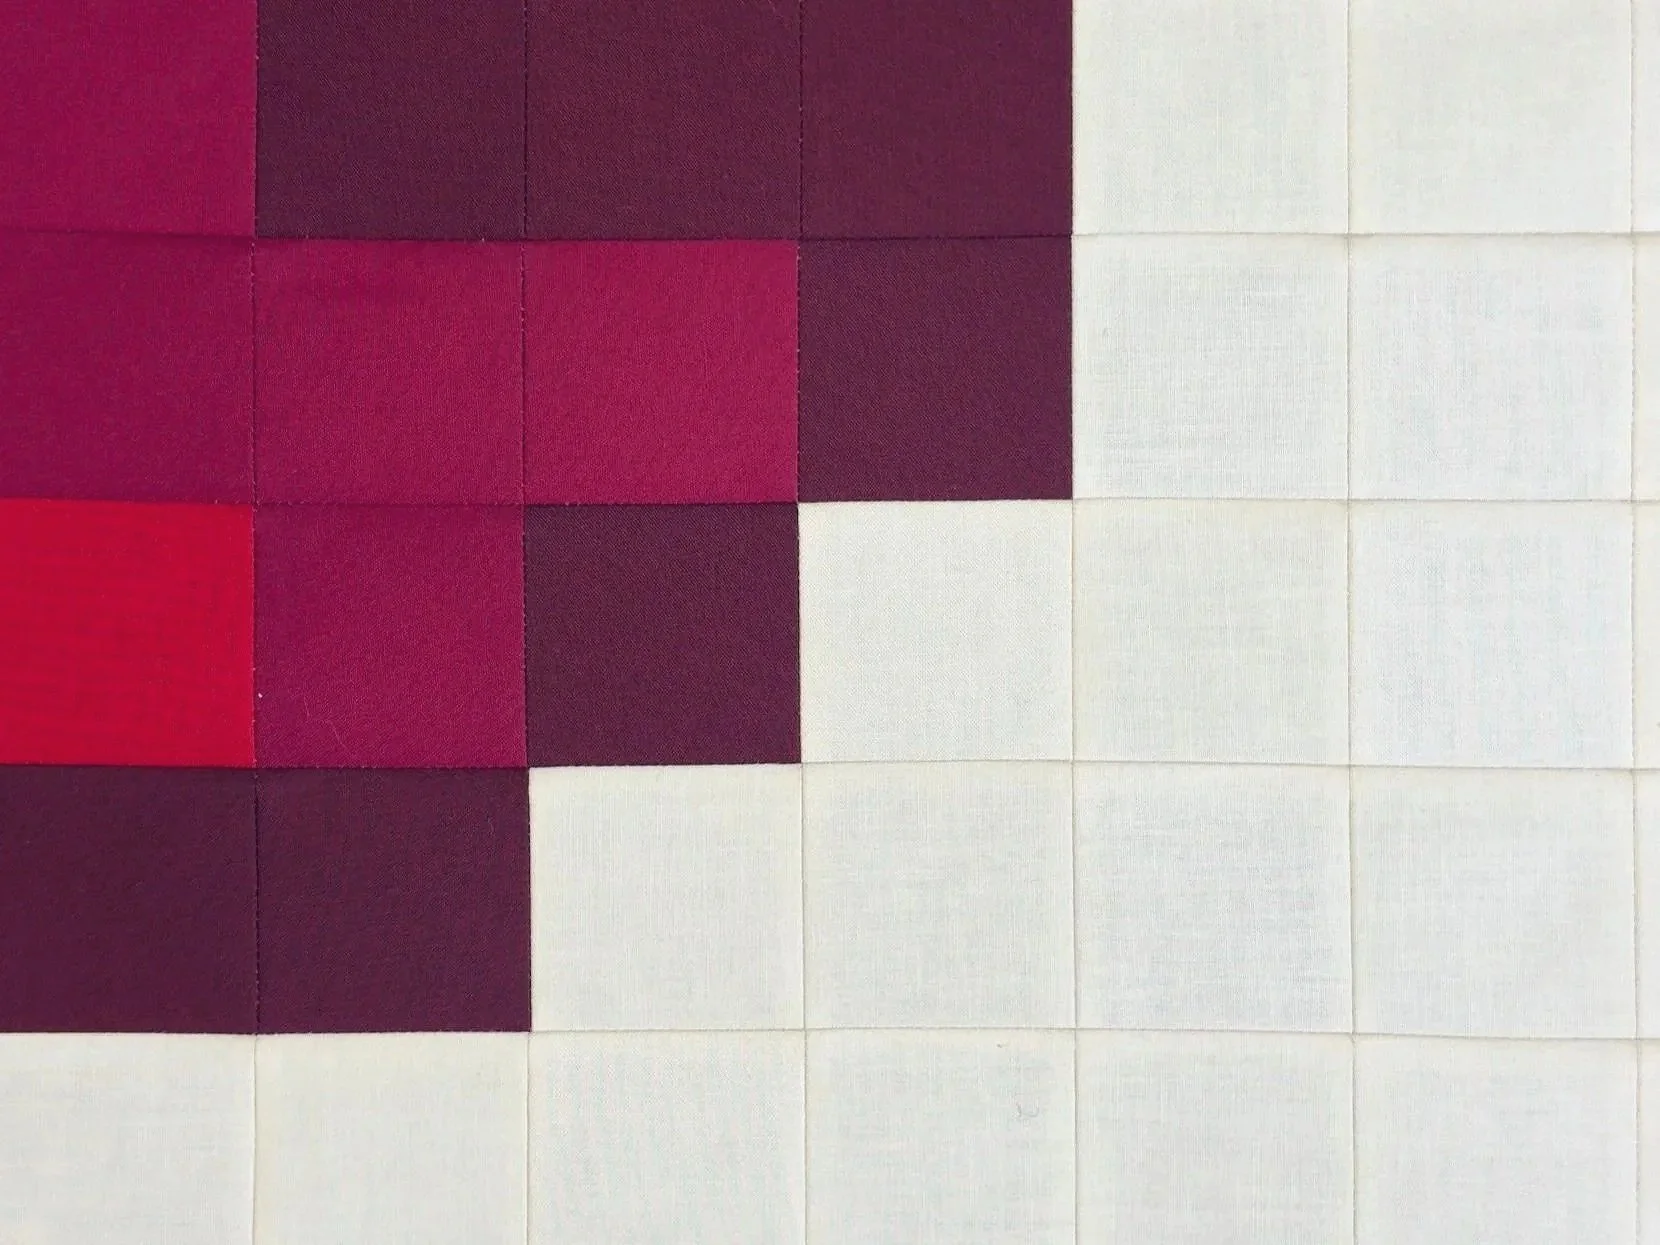
A fusible grid keeps everything organized and prevents your fabric squares from shifting or warping. The gird helps rows stay straight and points align beautifully.
It also allows you to visually check your design before permanently sewing it together — which is especially helpful with pixel quilts where color placement matters.
And let’s be honest — it’s a time saver. Your quilt top comes together much faster than sewing individual squares, and you’ll significantly reduce the need for pins and clips.
Common Questions and Concerns
Is using a fusible grid cheating?
No. It’s simply a tool — just like a rotary cutter or specialty ruler. You’re still cutting, sewing, pressing, quilting, and finishing your quilt.
Will it make my quilt stiff?
Yes — temporarily. The interfacing adds structure while you’re working, but once the finished quilt is washed, it softens significantly.
Can I make this quilt without a fusible grid?
Absolutely. Each Pixel Blooms pattern includes two additional construction methods.
Pixel block method: Cut small squares and sew them into pixel blocks, then sew those blocks together to form the quilt top.
Group cut method: Instead of cutting uniform squares this method uses larger squares and rectangles that are pieced together more traditionally.
The fusible grid is simply one option — choose what works best for you.
How to Use a Fusible Grid
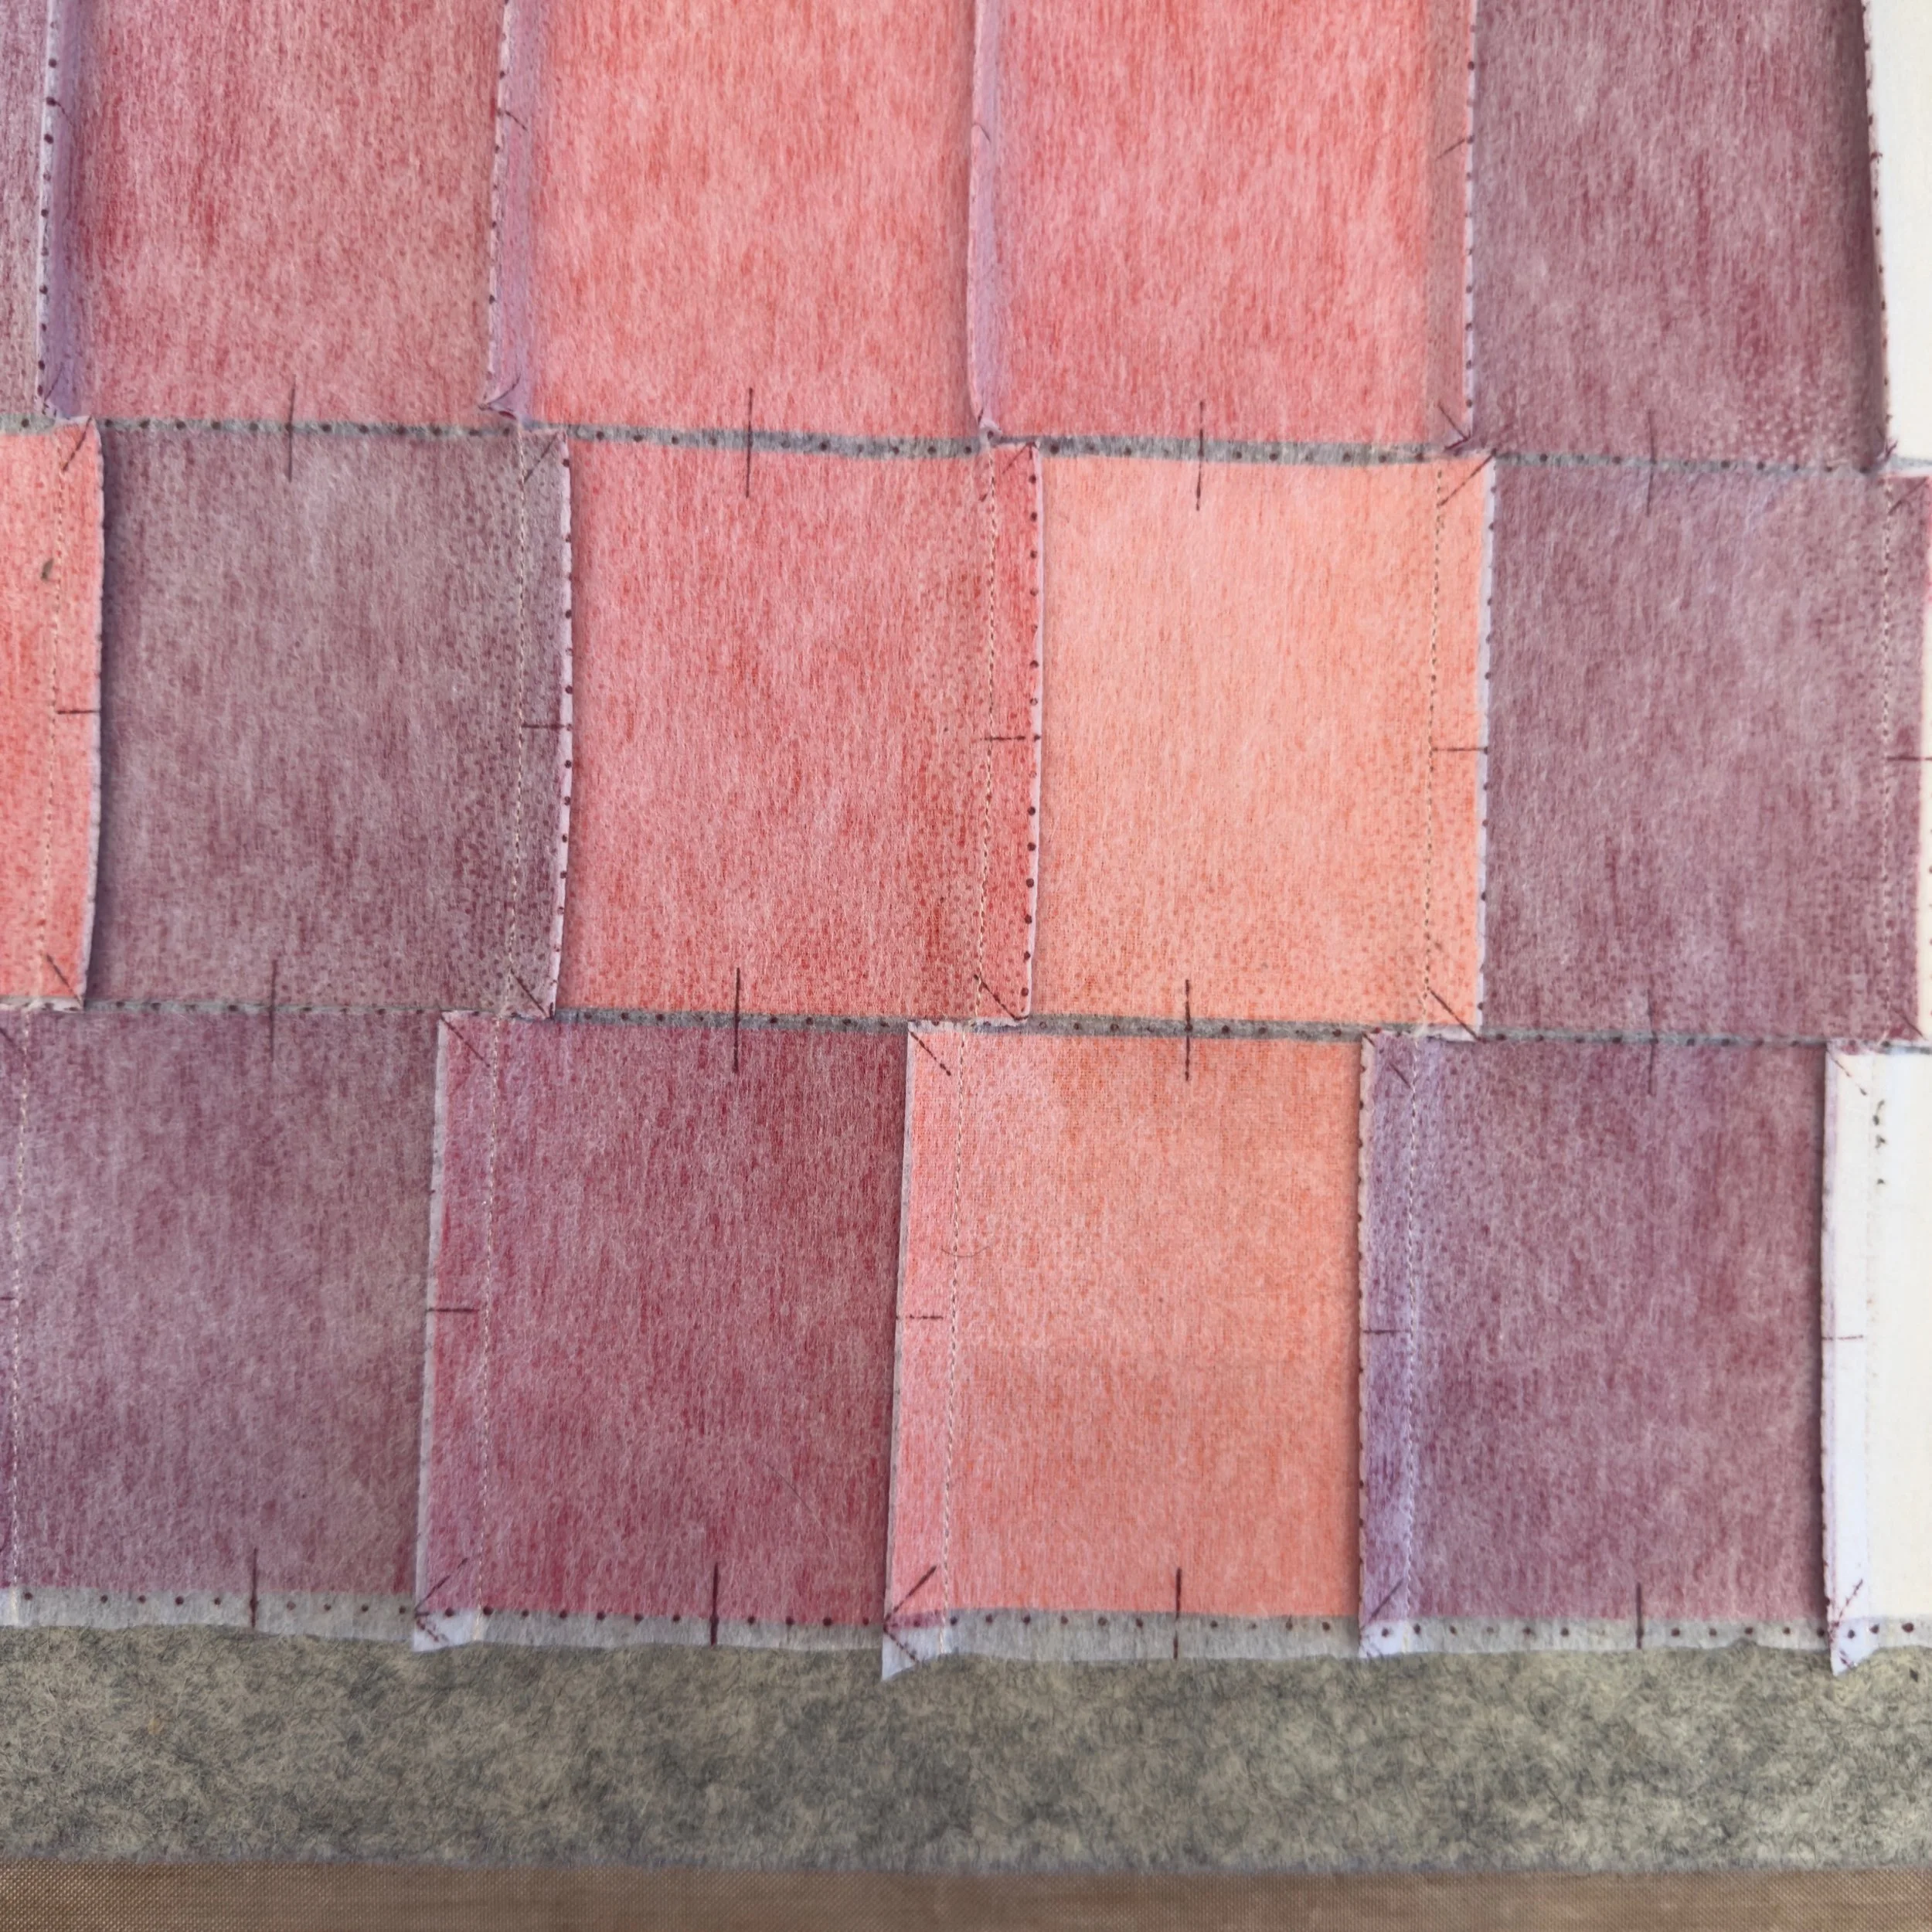
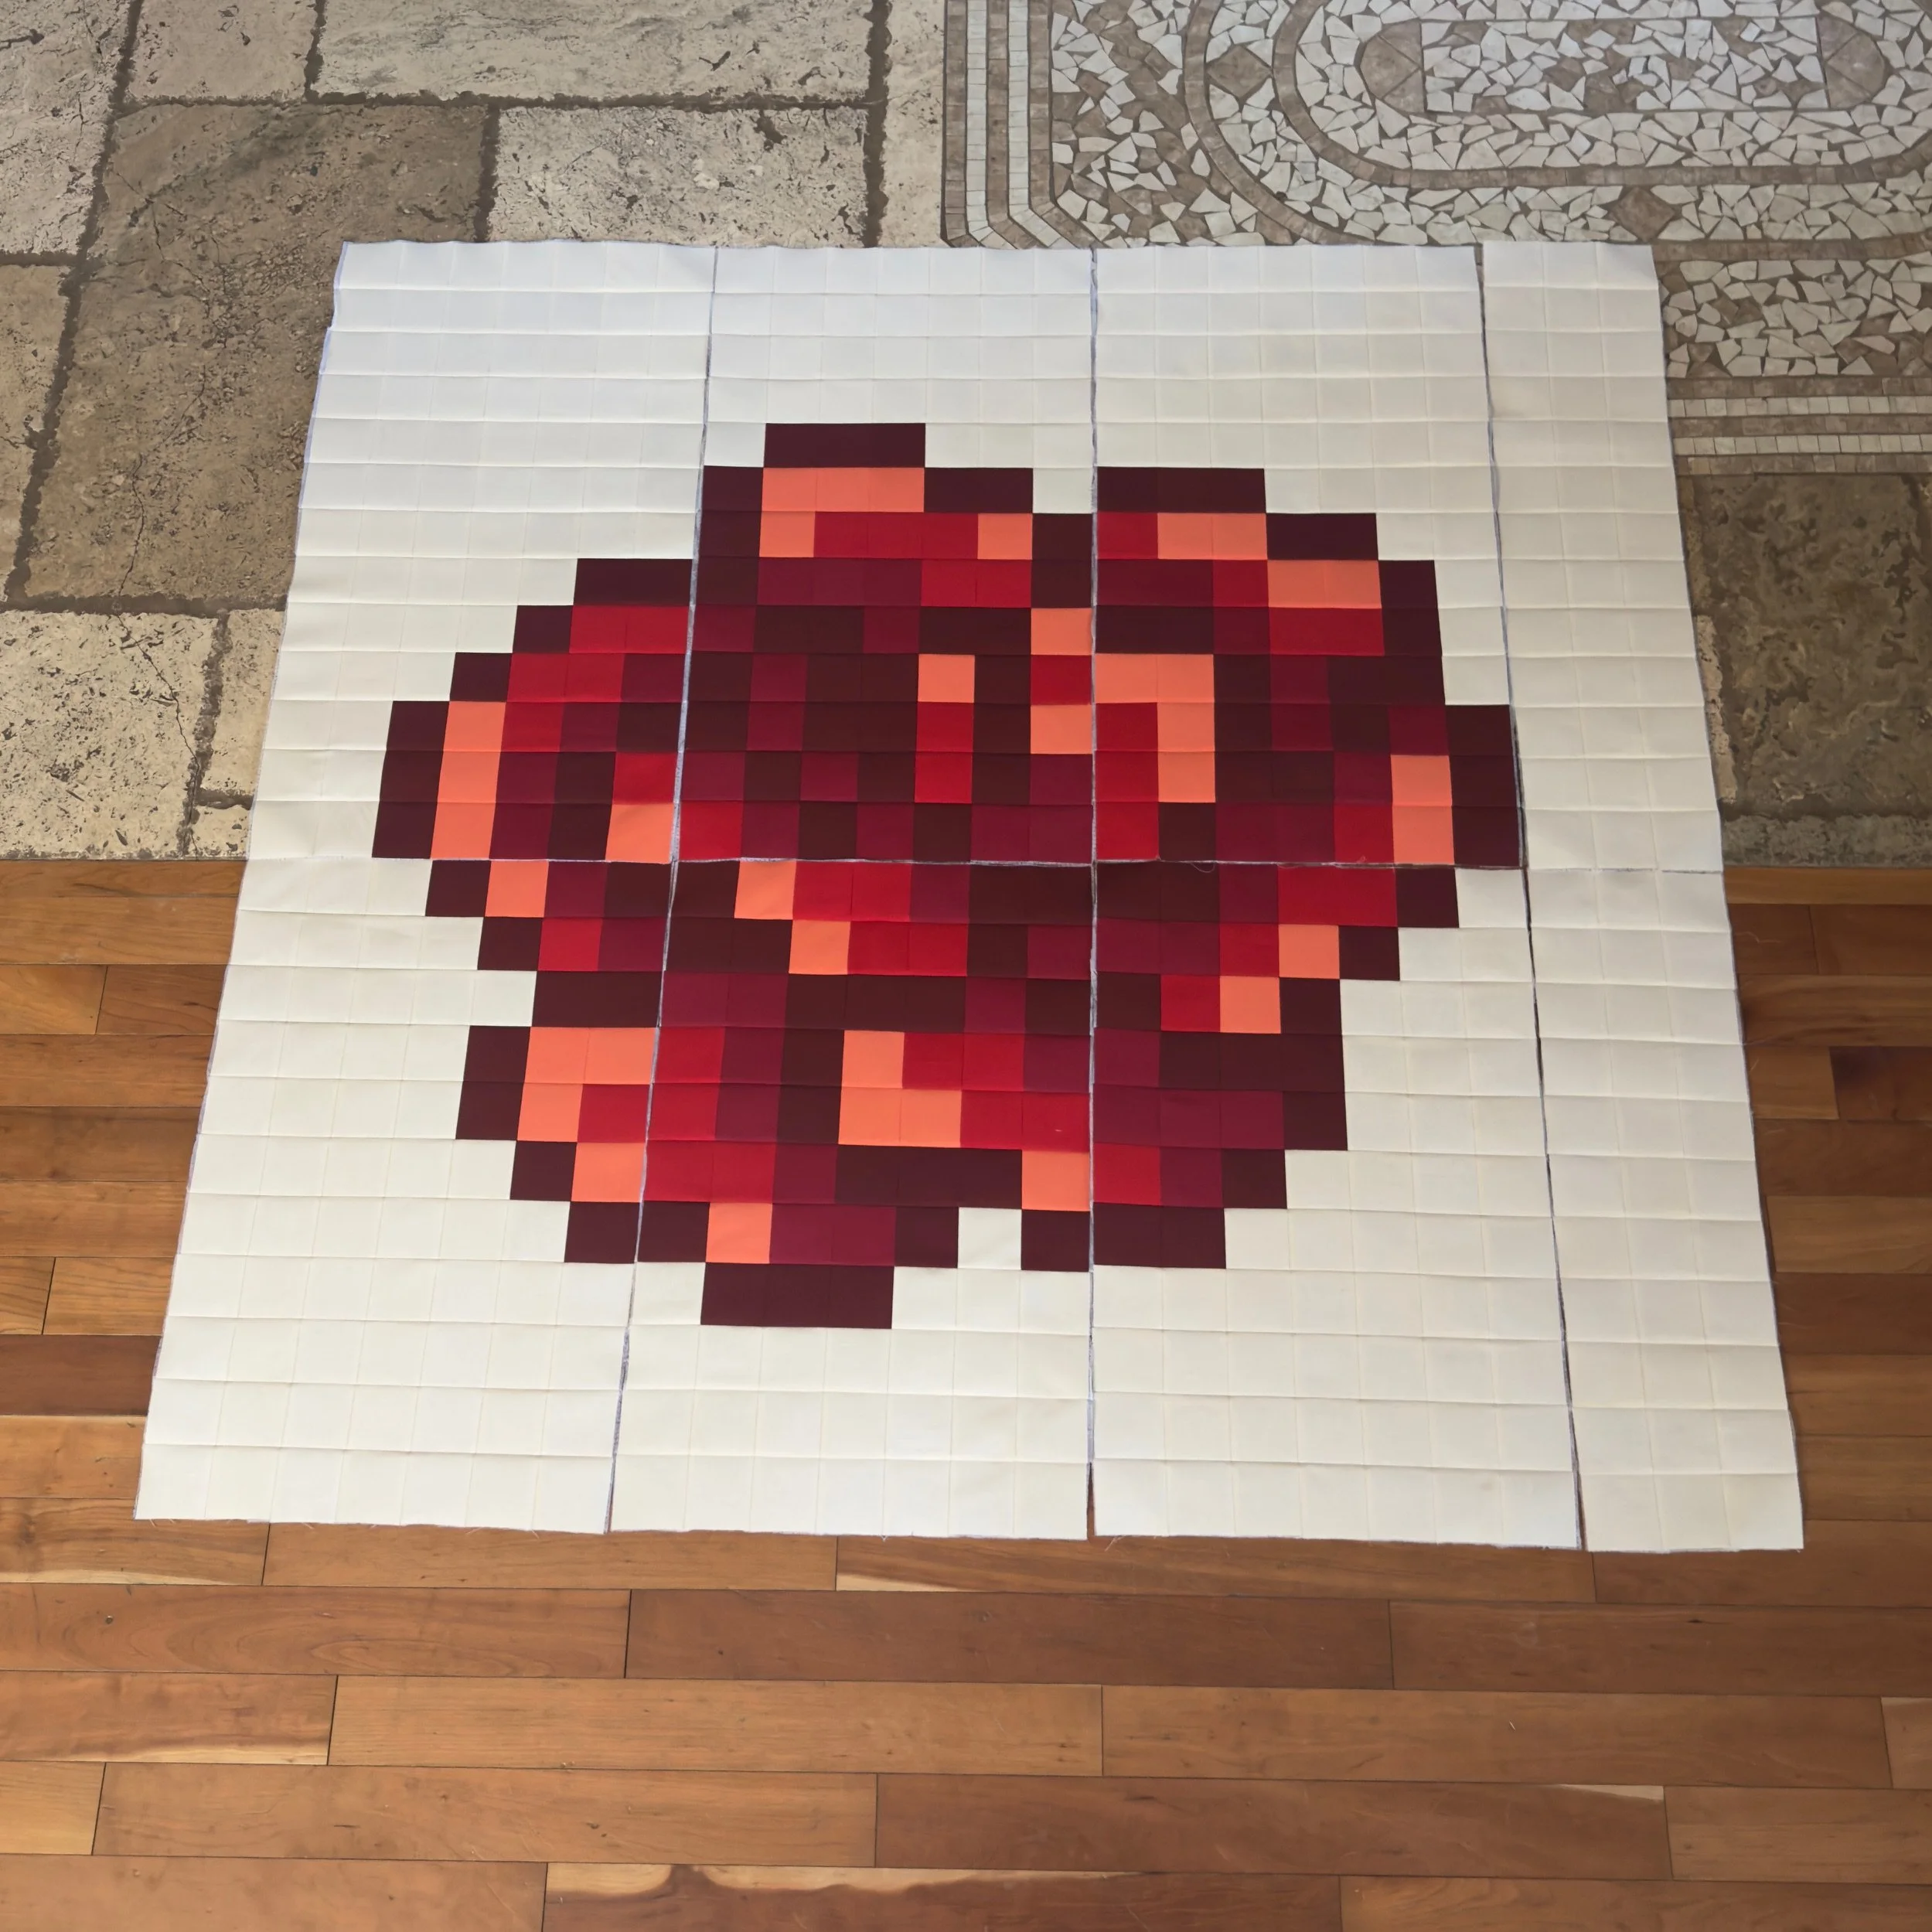
Lay Out the Design
Place the fusible grid on a pressing surface.
Working section by section, use the pixel cut diagram in your pattern to place each square in it’s correct position. Align the fabric right side up inside each grid square and double-check your color placement before moving on.
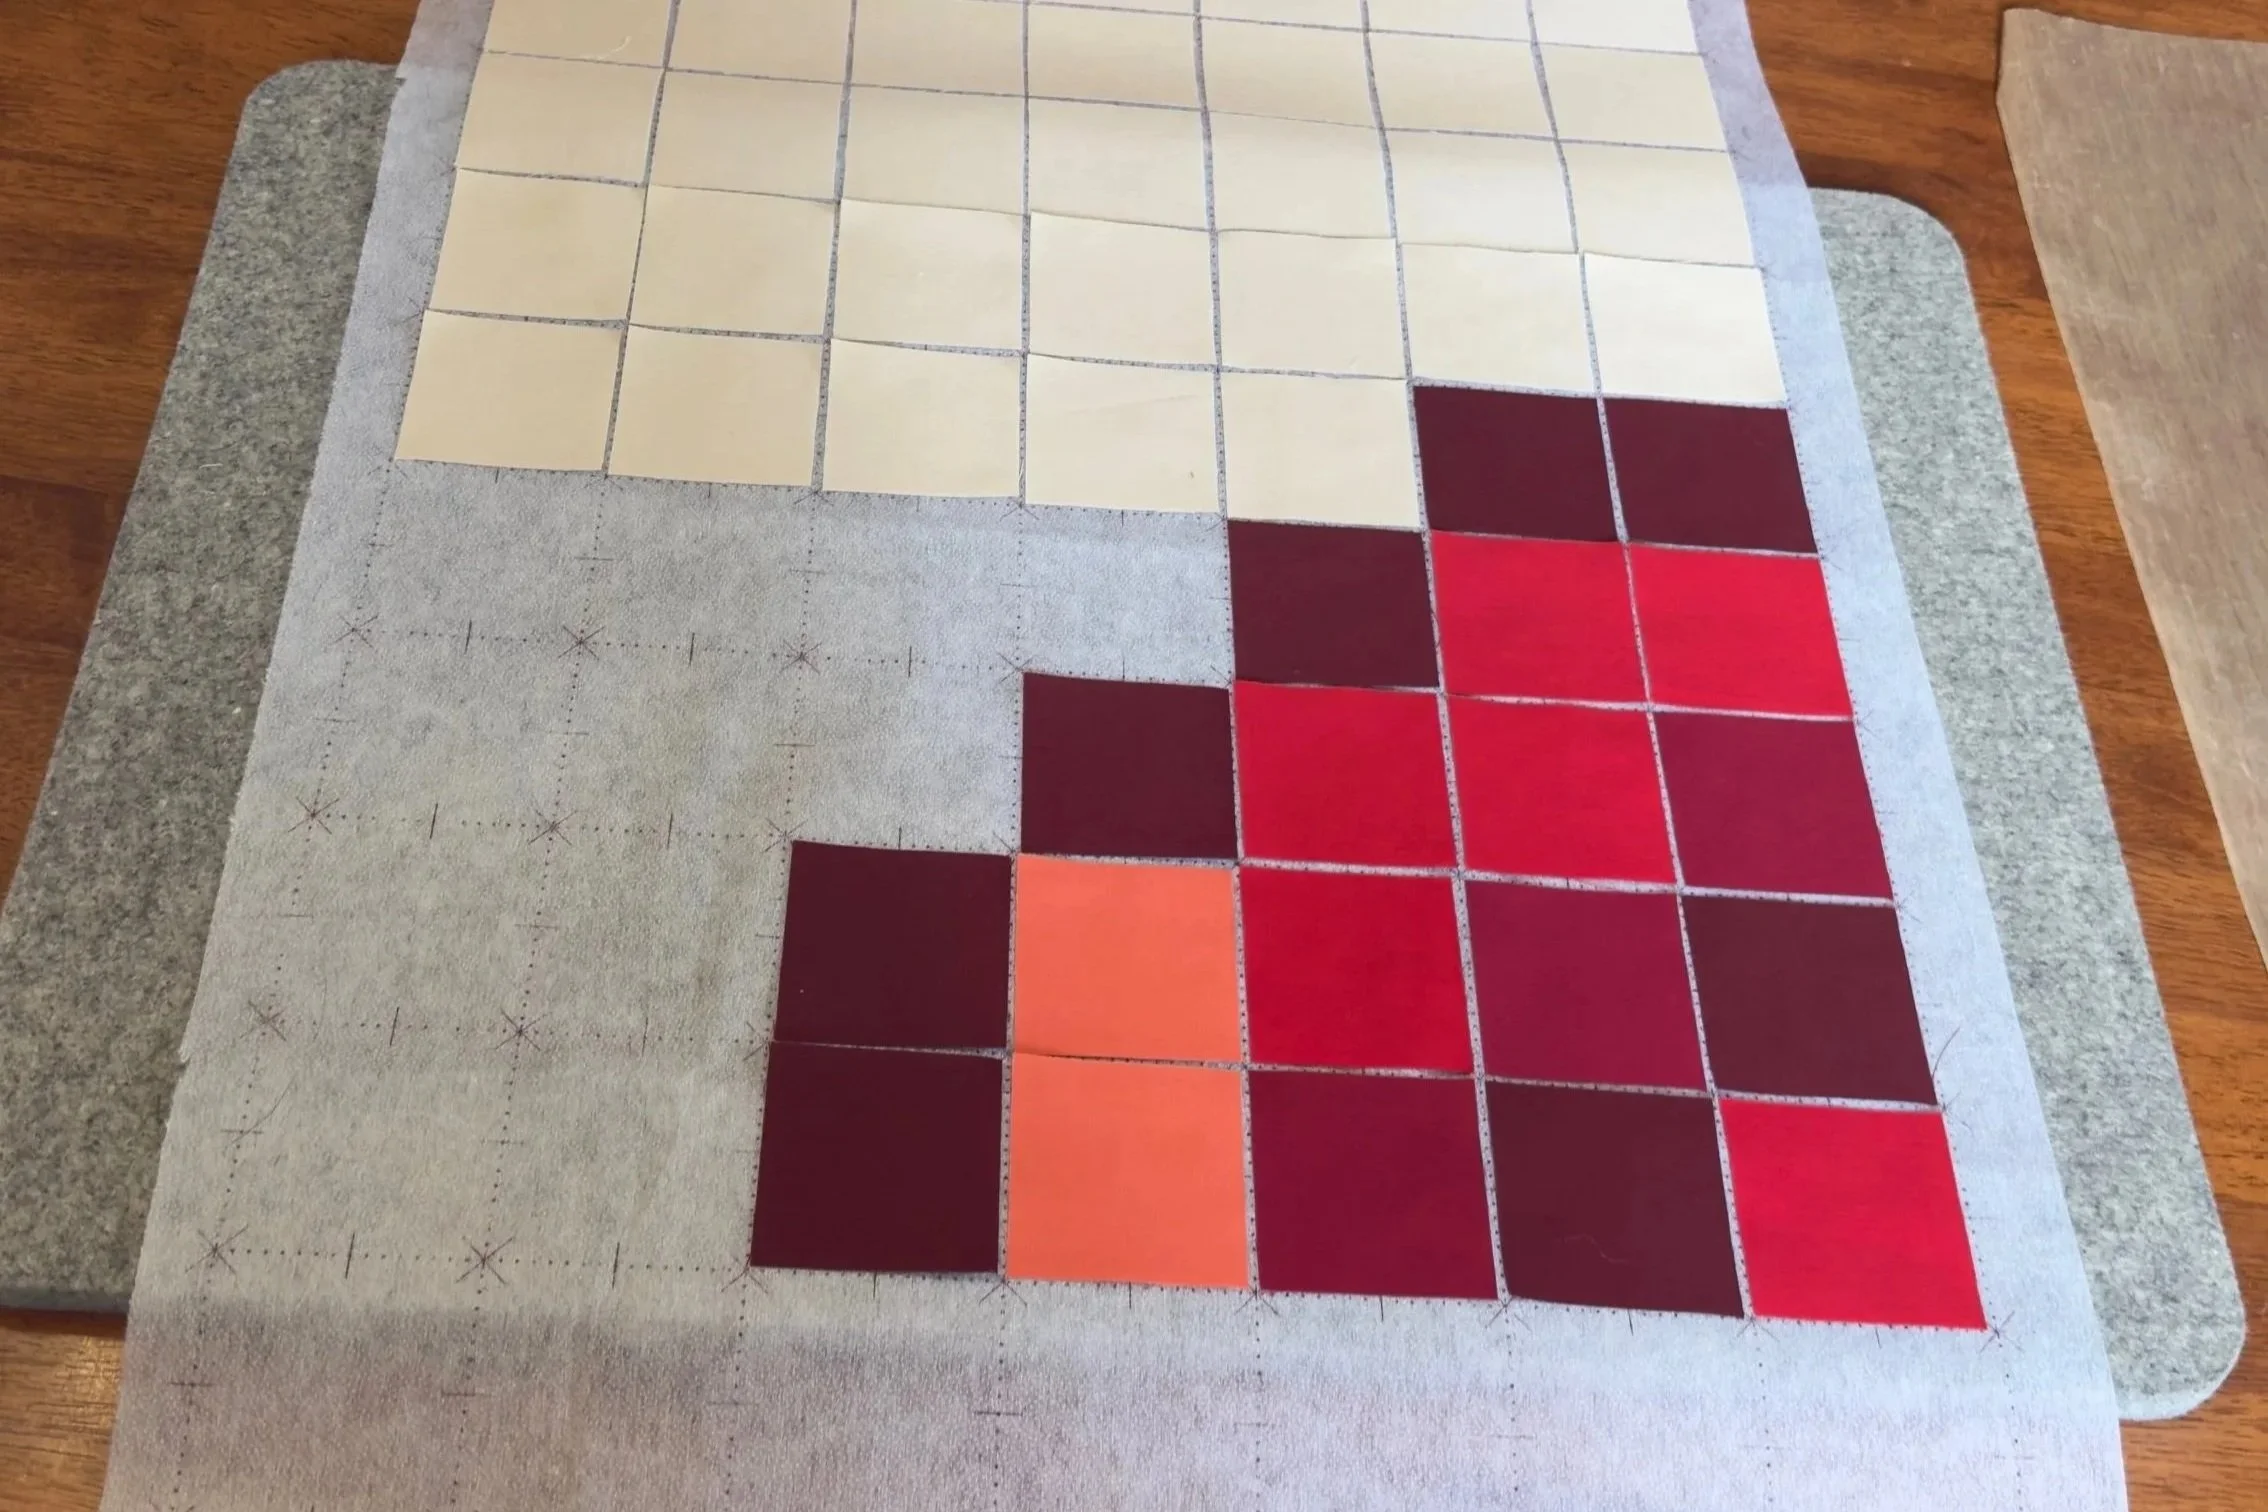
Take your time here — this is your chance to confirm everything looks exactly how you want it.
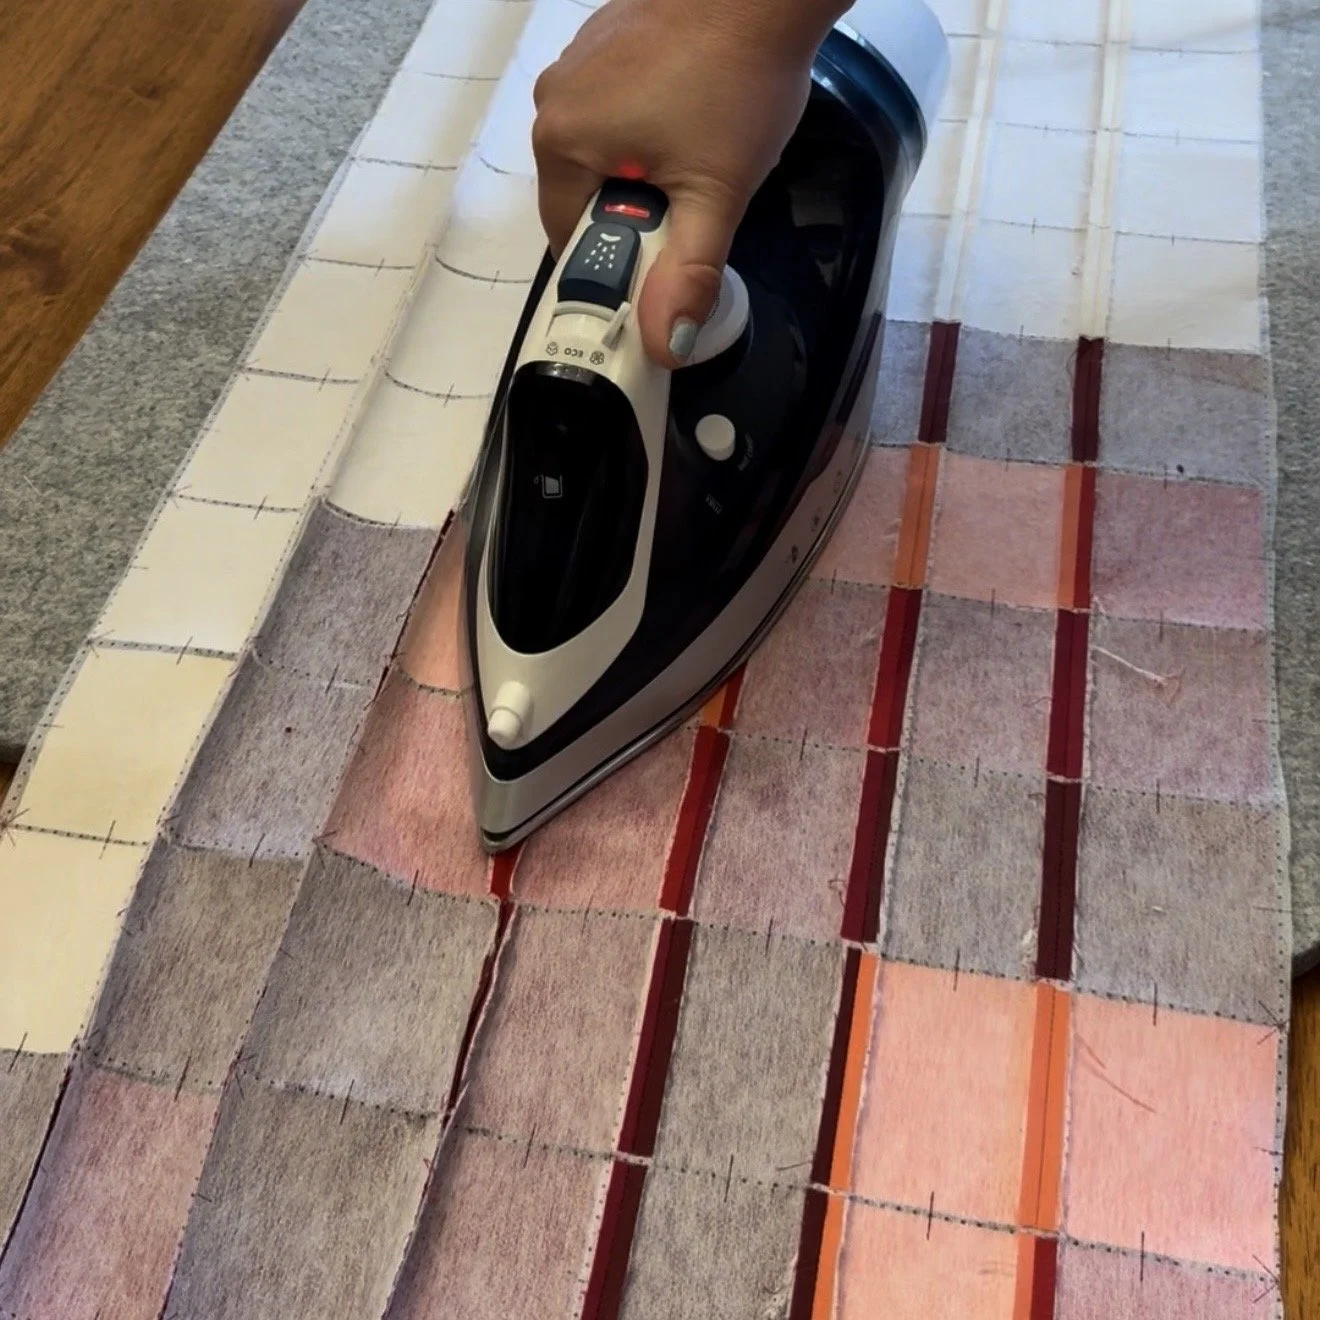
Fuse It in Place
Once a section is laid out, it’s time to fuse.
Follow the manufacture’s heat instructions carefully. I like to lightly mist the fabric with water before fusing.
When pressing:
Press the iron straight down, then lift it up to move to the next area.
Do not slide the iron — this can shift your squares.
To protect your iron from adhesive, use a pressing cloth or vinyl sheet between your iron and the project.
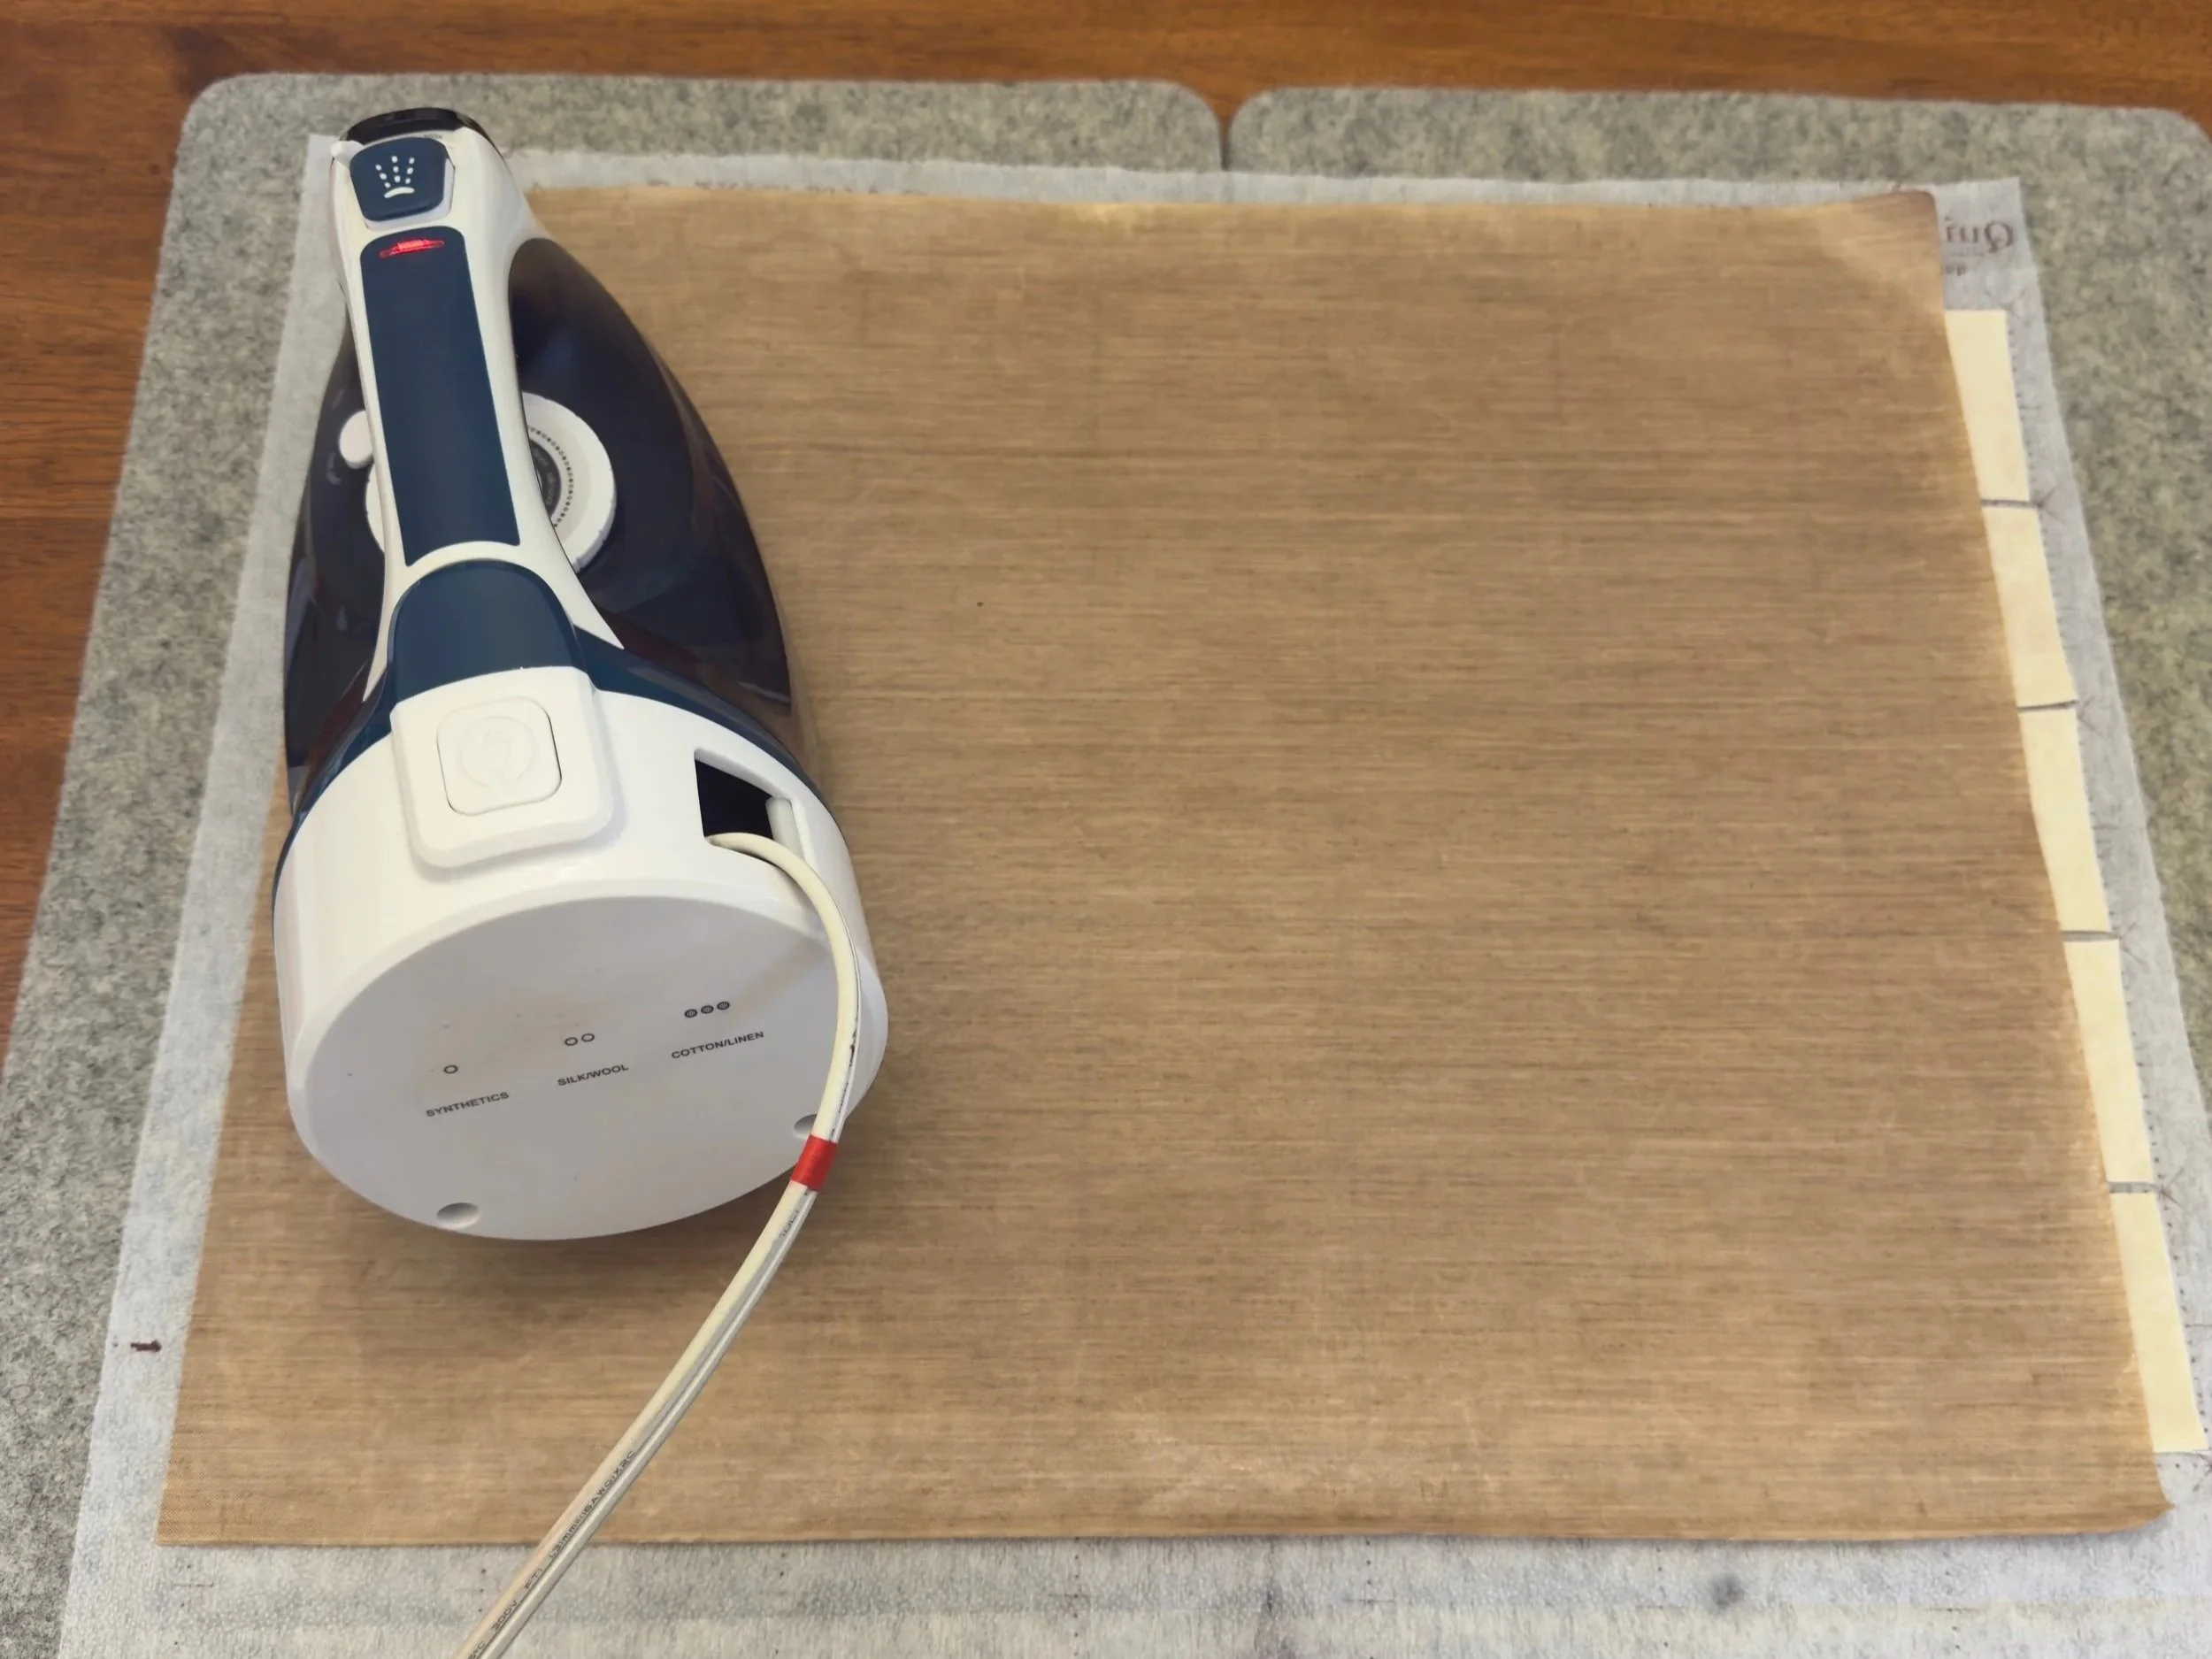
Before moving the grid, let it cool completely. This helps the adhesive set properly.
Sew Along the Grid Lines
Now that everything is fused and secure, it’s time to sew.
We’ll start with the vertical lines.
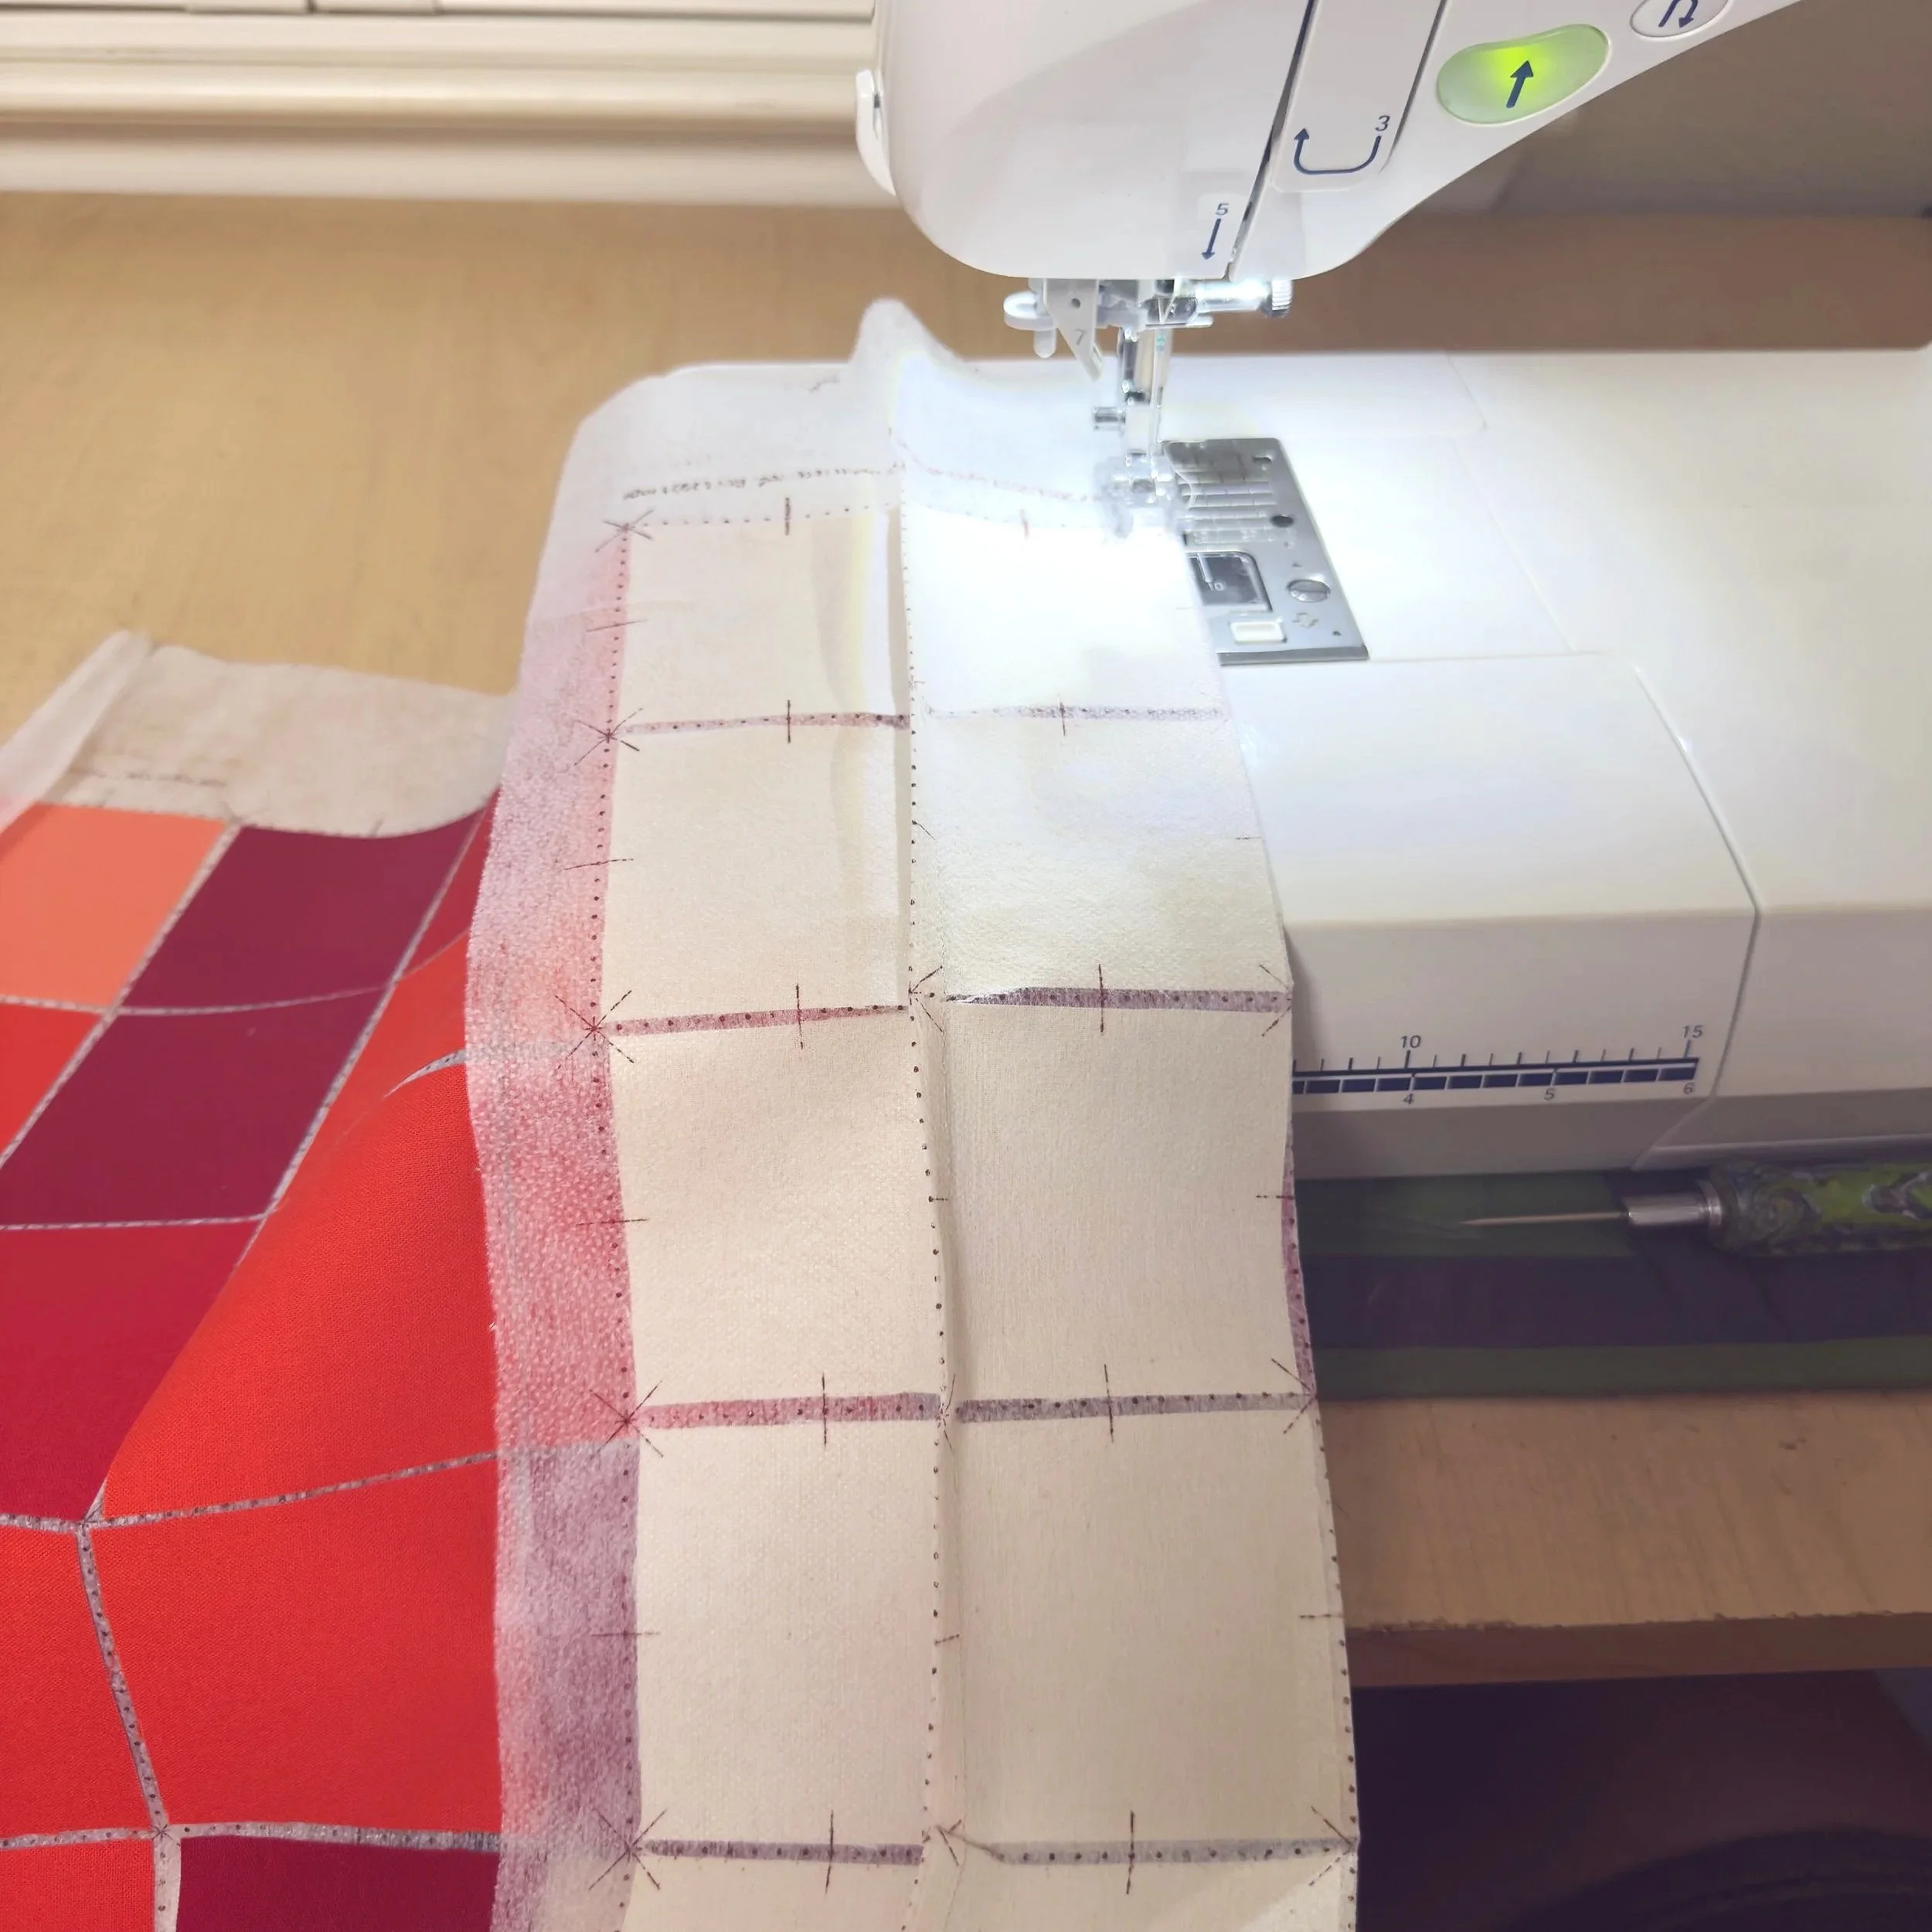
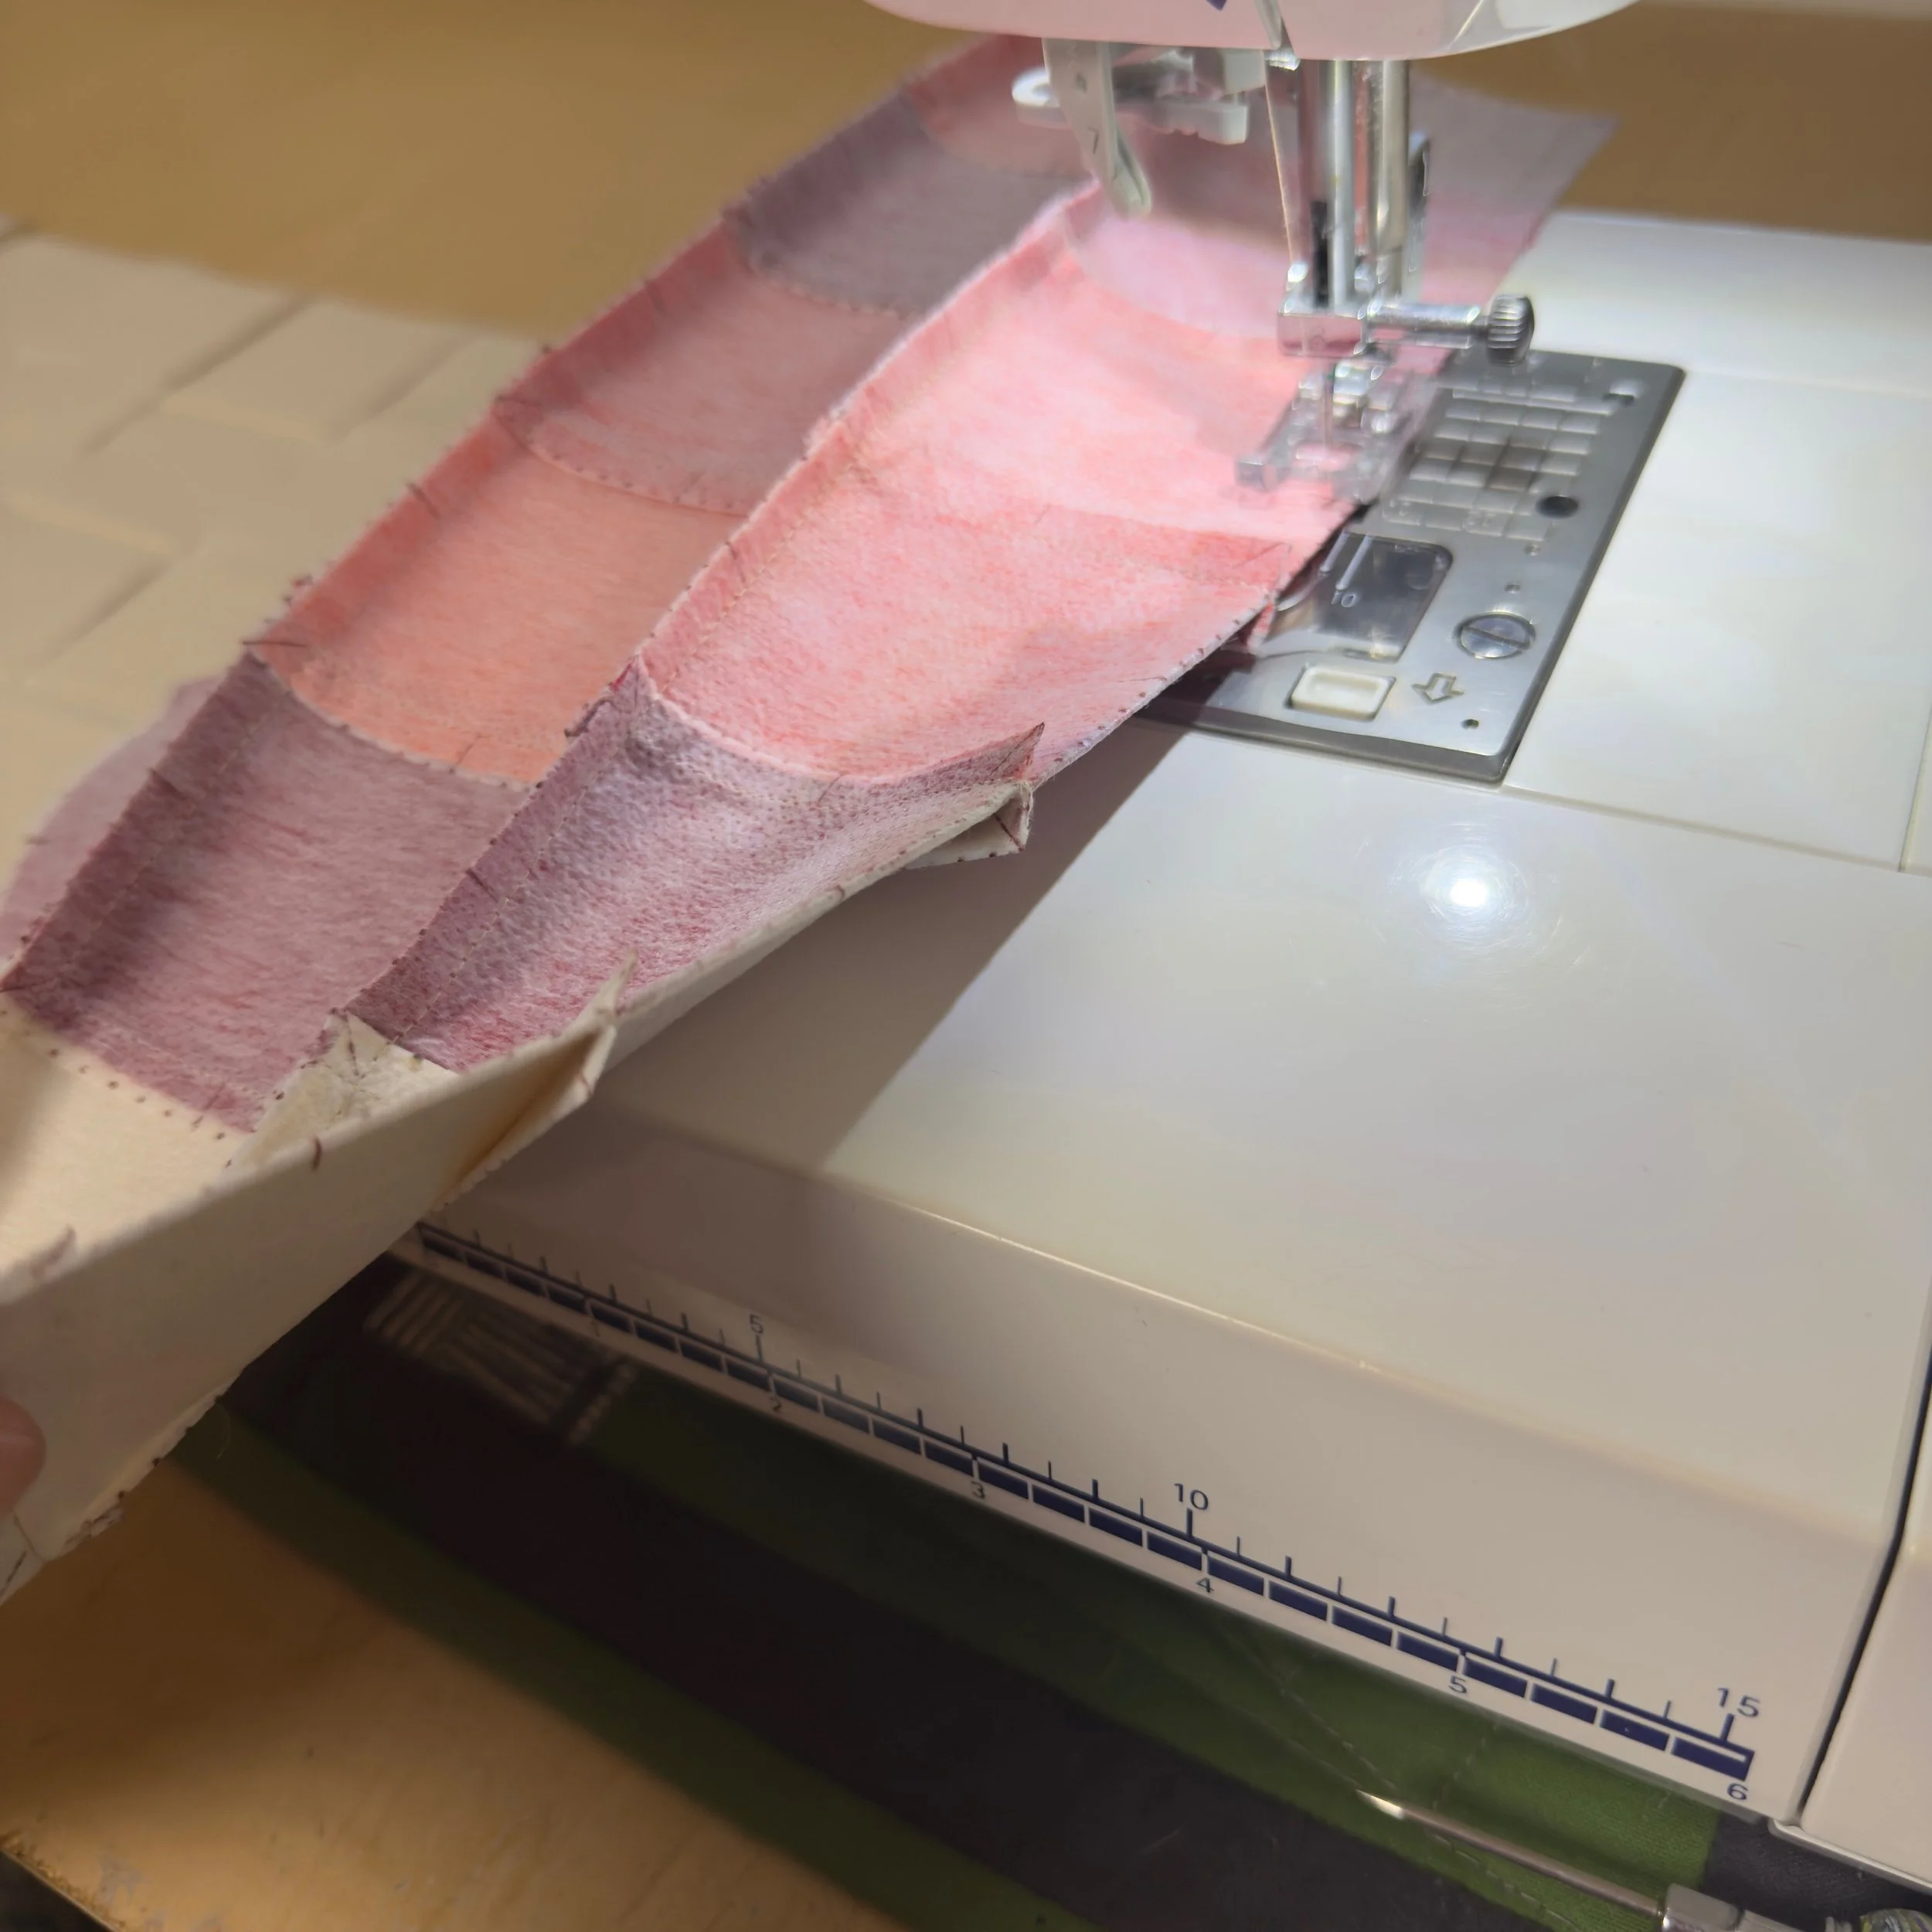
Sewing the Vertical Lines
Start at one side of the panel.
Fold the panel right sides together so the printed vertical grid line sits directly on the fold.
Sew a 1/4” seam allowance along that folded edge.
Move to the next grid line:
Fold along the line, right sides together
Sew another 1/4” seam
Continue folding and sewing until all vertical seams are stitched.
Opening & Pressing the Vertical Seams
Once all vertical seams are sewn, you have two options:
Option 1: Seam rip or carefully cut the interfacing along the vertical folded grid lines and press the seams open.
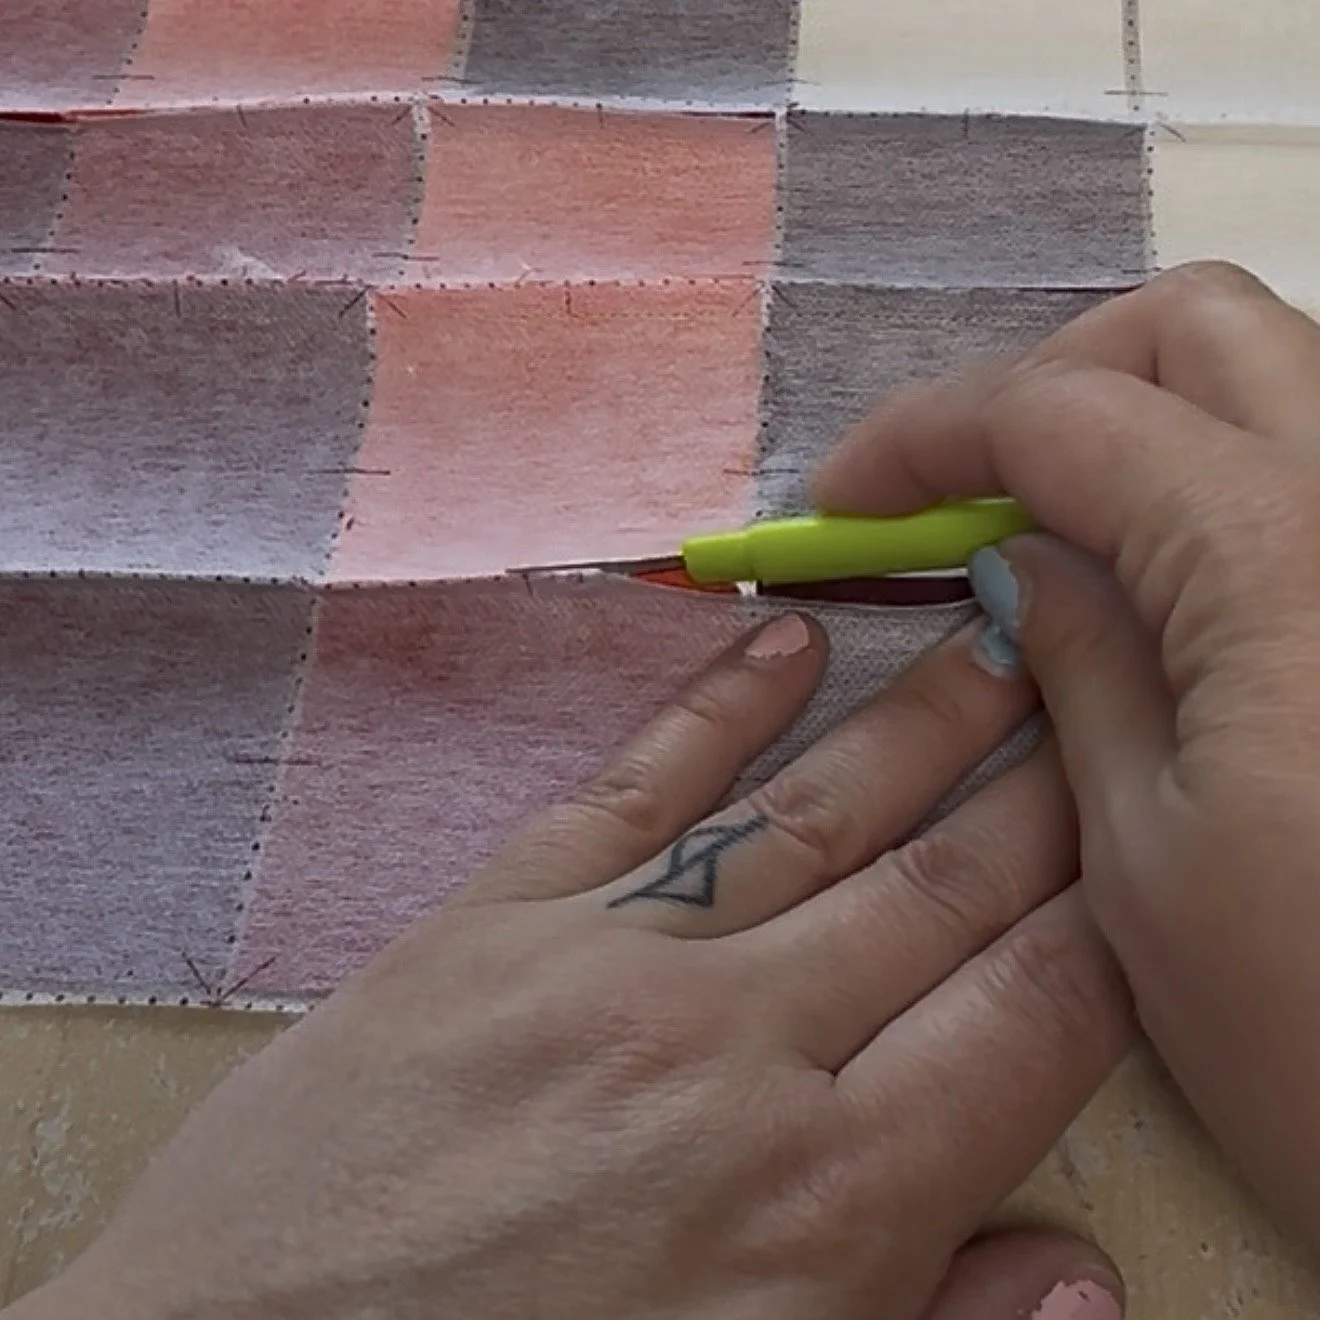
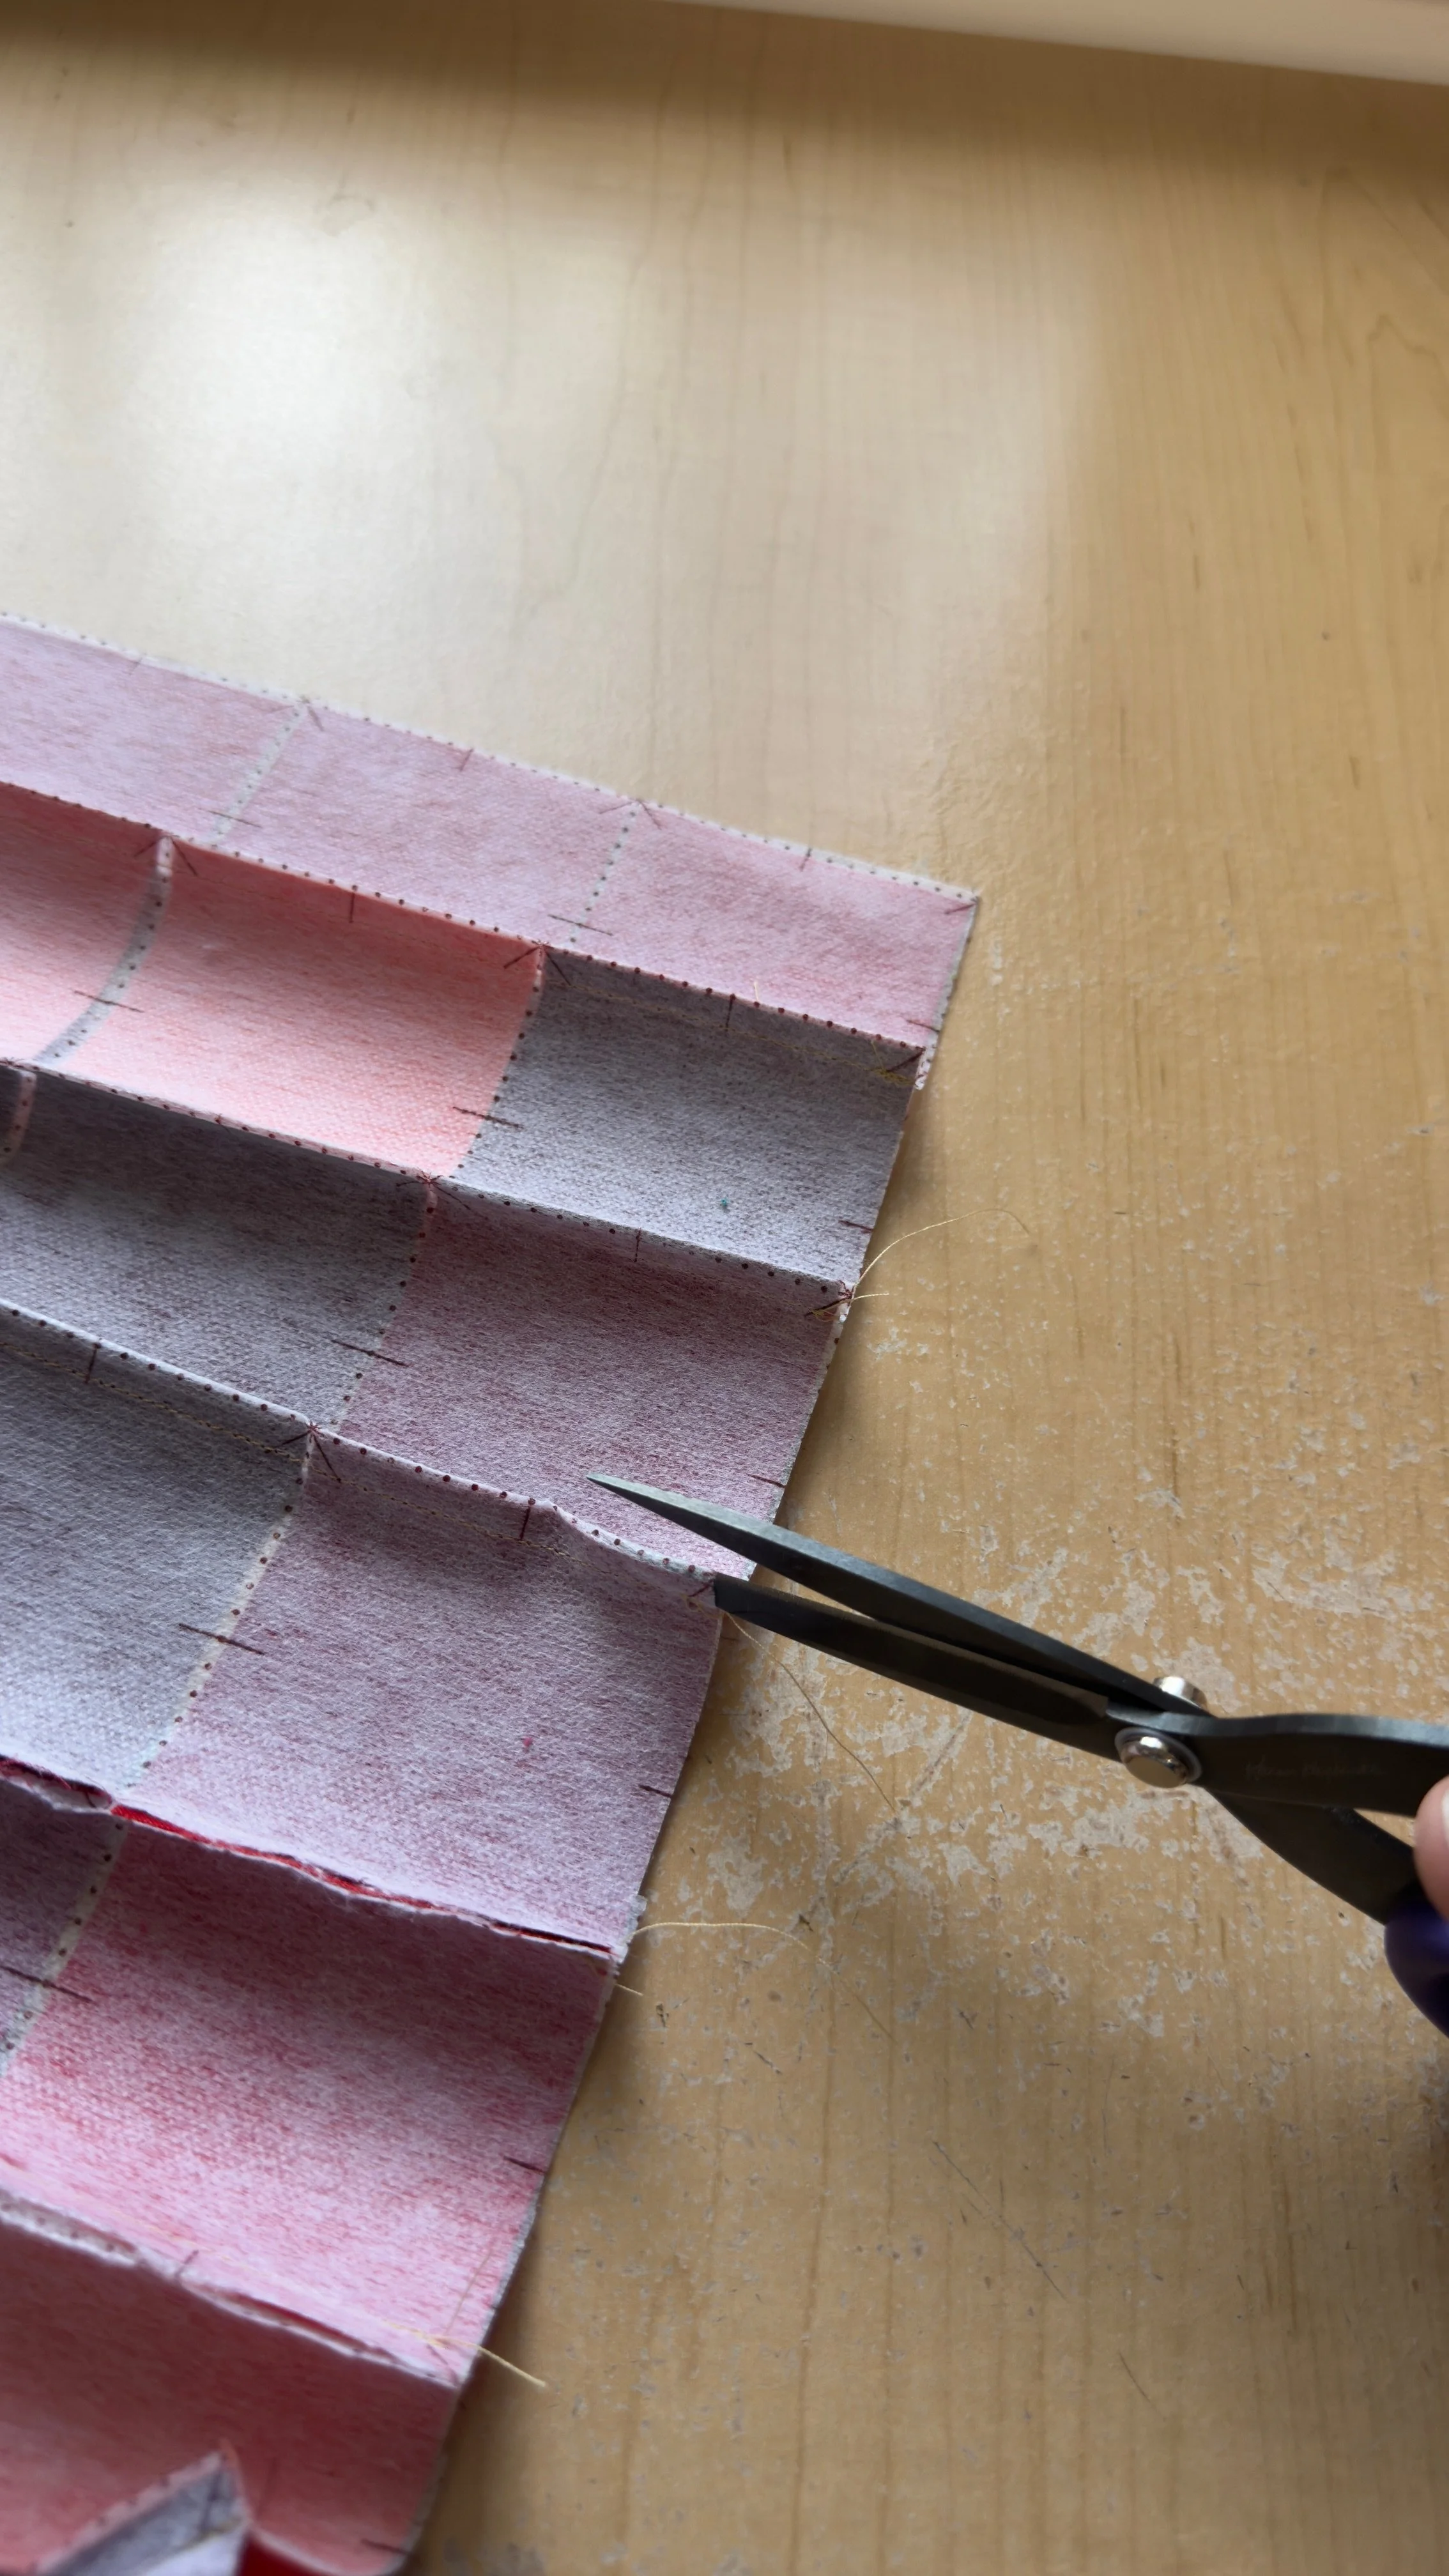
Option 2: Snip the grid on the horizontal grid lines between each fabric square (just into the seam allowance snipping up to the stitching, but being careful not to cut through the stitches.) Then press each row’s seams in alternating directions.
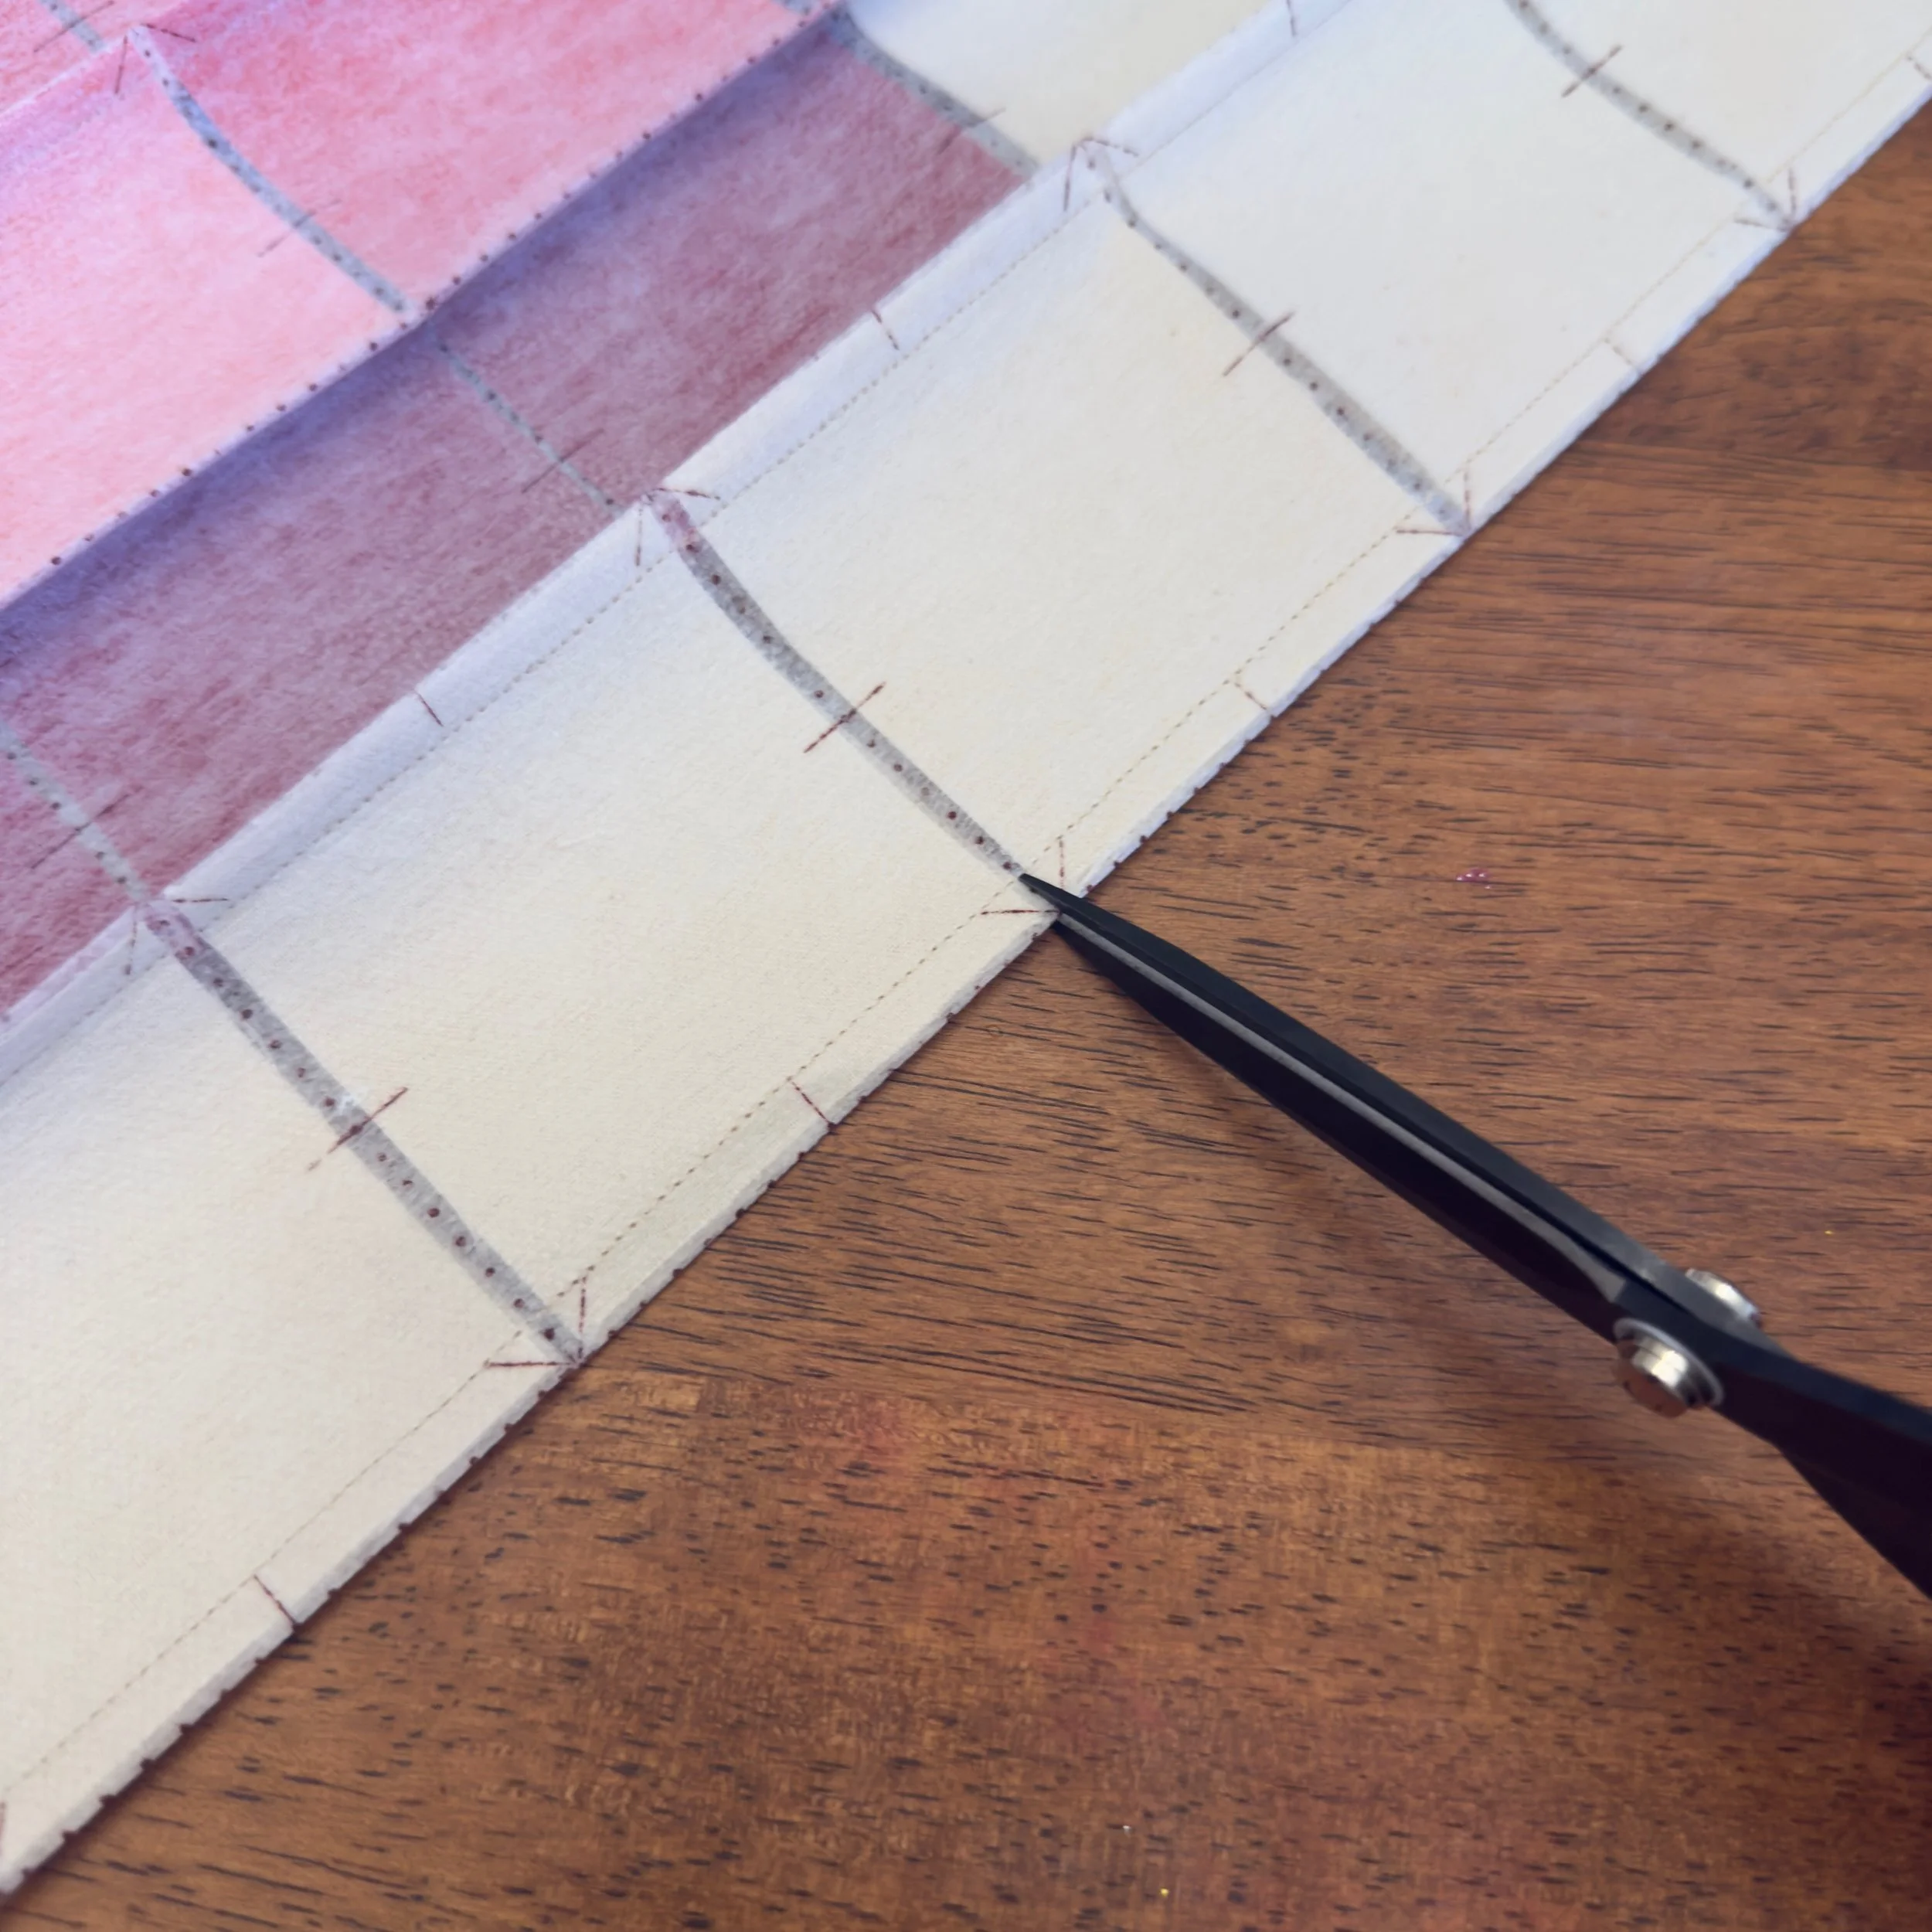
Pressing rows in opposite directions allows seams to nest beautifully when sewing the horizontal lines.
Neither option is better — it simply comes down to preference. Do you prefer pressing open or nesting seams?
Sewing the Horizontal Lines
Now repeat the same process in the opposite direction making sure the vertical seams stay open or nested as you sew.
Fold along a horizontal grid line, right sides together.
Sew a 1/4” seam allowance.
Move to the next horizontal line.
Fold and sew.
continue until all horizontal seams are stitched.
Opening & Pressing the Horizontal Seams
Again you have two options:
Option 1: Seam rip or cut the interfacing along the horizontal grid lines and press the seams open.
Option 2: No need to cut anything. Simply press the seams in one direction. As you go, pay attention to the overall layout and placement of each panel. Press the horizontal seams on adjacent panels in the opposite direction so the seams nest nicely when you join the grid panels together.
Now your fusible grid panel is finished. Repeat these steps to complete all the panels needed for your quilt.
Sewing Fusible Grid Panels Together
Once all required fusible grid panels are complete, it’s time to assemble the quilt top. This step in very similar to sewing traditional quilt blocks together — we’re just working with larger sections.
Lay Out the Panels
Begin by laying out all of your completed panels in the correct order.
This is my favorite part. Take a step back and look at the design as a whole. Admire how far you’ve come and for the first time really see everything coming together.
Double-check the orientation of each panel. This is your moment to catch anything before sewing it all together.
Sew Panels into Rows
Working one row at a time, sew adjacent panels together.
Place two panels right sides together.
Match up each seam intersection carefully.
Insert a pin or clip directly at every seam intersection to keep pixels aligned.
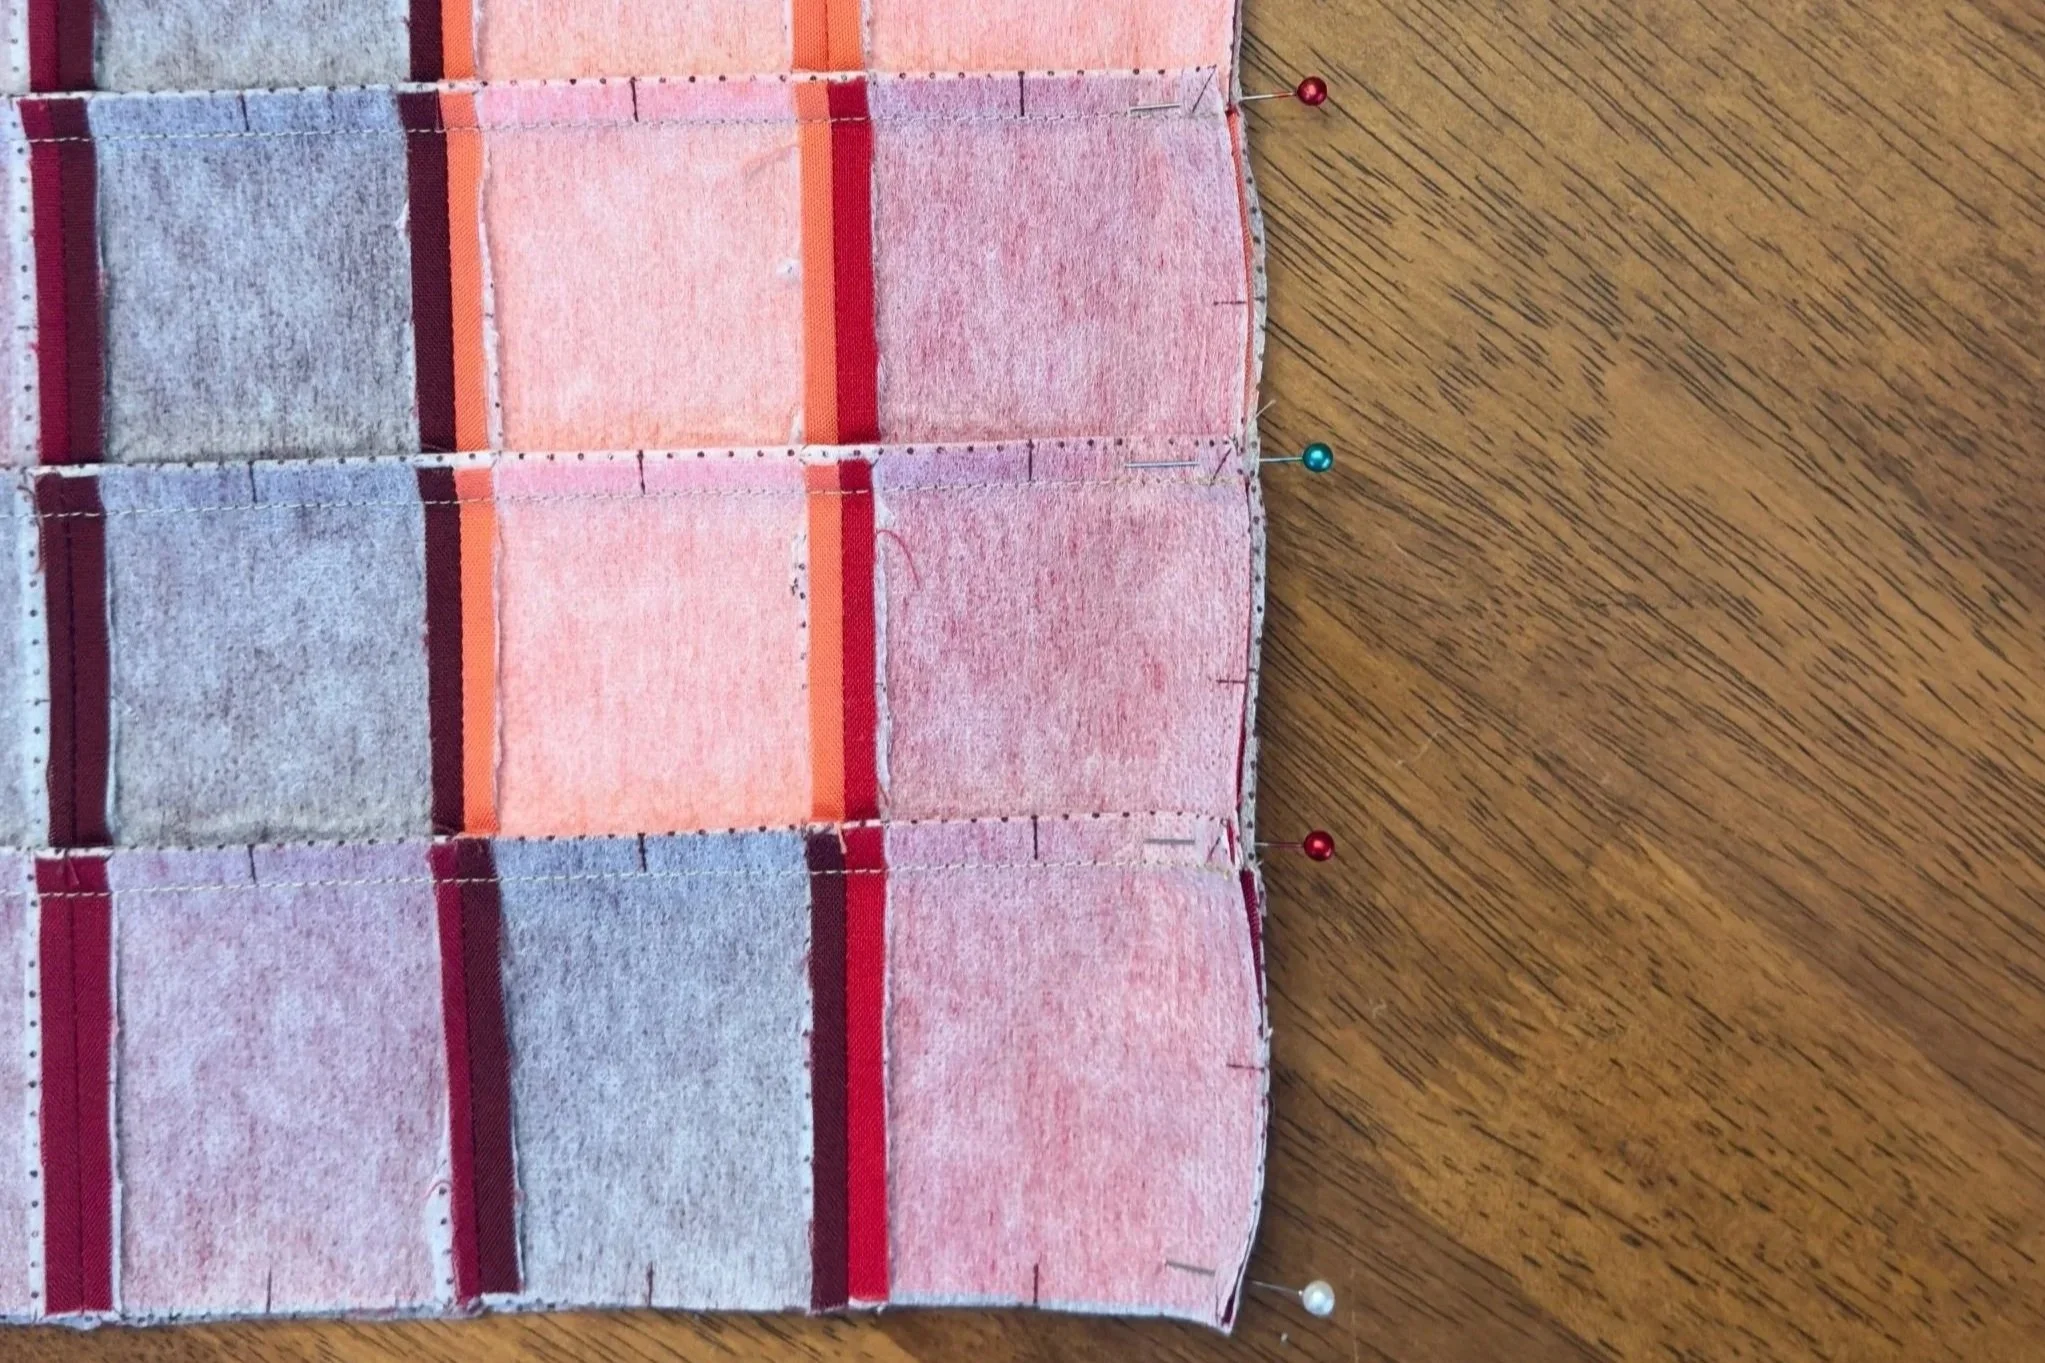
Because pixel quilts rely on precise seam matching, take your time here. Once pinned:
Sew a 1/4” seam allowance along the entire edge.
Remove pins as you sew.
Press the seam open or to one side — whichever method you’ve chosen in previous steps for consistency.
Continue this process until all panels in that row are sewn together. Repeat for each row until all rows are complete.
Sew the Rows Together
Now it’s time to join the rows.
Place two completed rows right sides together.
Match and pin or clip at every seam intersection across the row.
This is another important alignment step. Pinning the intersections helps prevent shifting and keeps your vertical and horizontal seams lined up nicely.
Sew a 1/4” seam allowance across the entire row.
Press the seam open or to one side.
Repeat until all rows are sewn together and your quilt top is complete.
Final Press
Once the entire quilt top is assembled, give it a final, thorough press. This helps everything lay flat. You will thank yourself later, when quilting, for taking the time to do this step.
Final Thoughts
Pixel quilts may look intricate, but they’re built one square at a time. Fusible grid simply gives you structure and stability so you can focus on the fun part — watching your design come to life.
If you’re feeling overwhelmed at the beginning, remember: you don’t have to sew hundreds of squares all at once. Just lay out one section. Fuse it. Sew it. Then move to the next.
Before you know it, those pixels become a beautiful quilt top.
This tutorial is part of my Pixel Blooms quilt series — twelve birth flower designs, one for each month of the year. Stay tuned and keep checking back as this quilt series is released.
You might be stitching:
Your child’s birth flower
Your own
A meaningful gift
Or collecting all twelve to create something even bigger
However you’re using these patterns, I hope this method helps you feel confident and supported along the way.
If you make one of my Pixel Blooms quilts, I’d truly love to see it. You can share it and tag me, or simply send me a photo — seeing your fabric choices and watching these designs come to life in your hands is one of my favorite parts of being a designer!
One square at a time, we’ll grow a whole garden together.
You’ve got this.